

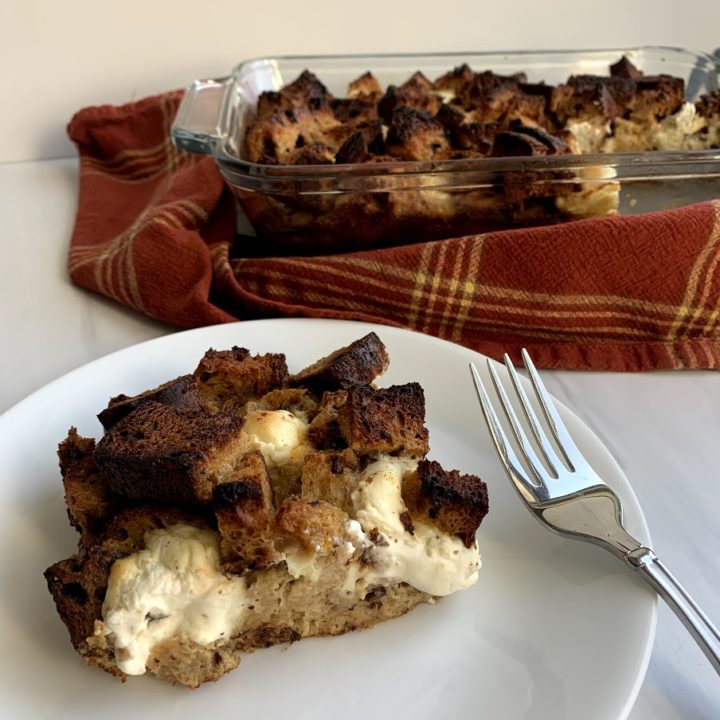
Get ready for the gluten-free French toast casserole of your dreams! Always a crowd-pleaser and a great make-ahead option for the holiday season.
This post may contain affiliate links. Please see my disclosure page for more information. Thanks!
About This French Toast Casserole Recipe
Years ago, before my celiac disease diagnosis, my aunt made a French toast casserole that had me drooling. Recently, I decided to replicate it with a few changes and tweaks - and to be gluten-free, of course!
This recipe is perfect for the holidays, especially after hosting something like Thanksgiving, where you've done a ton of cooking and baking. Because you prep it the night before, it's super simple to just wake up, take it out of the fridge, preheat your oven, and bake!
Ingredients You Will Need
Gluten-Free Bread: I prefer cinnamon raisin gluten-free bread for extra flavor and sweetness, but you can use regular bread too. You'll need 10-12 slices. See below for more information about what brands I use!
Cream Cheese: You need block cream cheese for this recipe, like Philadelphia or something similar. You can use dairy-free cream cheese if you can't do dairy, I just have not tested it.
Eggs: For the custard, we will pour over the bread.
Milk: Also for the custard, we will pour over the bread. You can use non-dairy milks if needed.
Spices: Cinnamon and nutmeg will give this the classic French toast taste.
Vanilla Extract: For added sweetness.
Maple Syrup: Also for added sweetness.
Brown Sugar: See the previous two ingredients. This is a decadent and sweeter casserole, but the results are drool-worthy!
What Gluten-Free Bread Should I Use?
For this recipe, I recommend Trader Joe's cinnamon raisin bread. You can use whatever gluten-free bread you prefer if you don't like cinnamon raisin. It's also great with regular gluten-free white bread and my favorite is Canyon Bakehouse Heritage white bread.
I've made both versions of this recipe - one with cinnamon raisin bread, and one plain, and both come out fabulous.
Can I make this recipe with regular gluten-free bread?
Yes. I've made it using Canyon Bakehouse - my go-to for regular GF bread. But it's not as good as a cinnamon raisin! And if you aren't a cinnamon raisin person, I understand - regular gluten-free bread will still taste great instead.
Can I Make This Recipe Dairy-Free?
Yes, but I have not tried it!
I haven't made this recipe with dairy-free cream cheese, but I would suggest Kite Hill Foods or for a lactose-free version, Green Valley. You'd have to scoop out the cream cheese in small portions with a spoon because I've yet to find a block style of dairy-free cream cheese. But it should bake well. I used Kite Hill cream cheese for this dairy-free cheesecake which baked without any problems!
You can also use whatever non-dairy milk you prefer for the custard topping. I use certified gluten-free oat milk or almond milk, most often.
How To Make Gluten-Free French Toast Casserole
This gluten-free French toast casserole is still so simple to make! Watch me make it step-by-step below on Instagram:
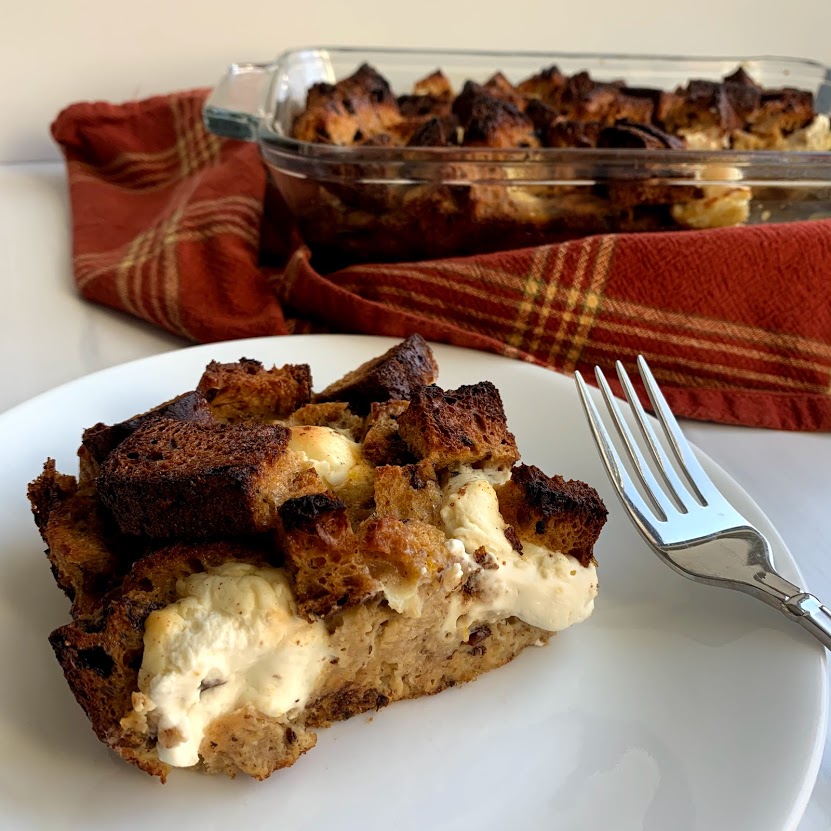
First, you layer cubed gluten-free bread in a casserole dish.
Then you add cubed cream cheese.
Then you layer more cubed bread on top.
Finally, you pour the egg/milk mixture over the whole thing, making sure everything is evenly coated. You can also use a spoon to mix if needed if some pieces don't get covered.
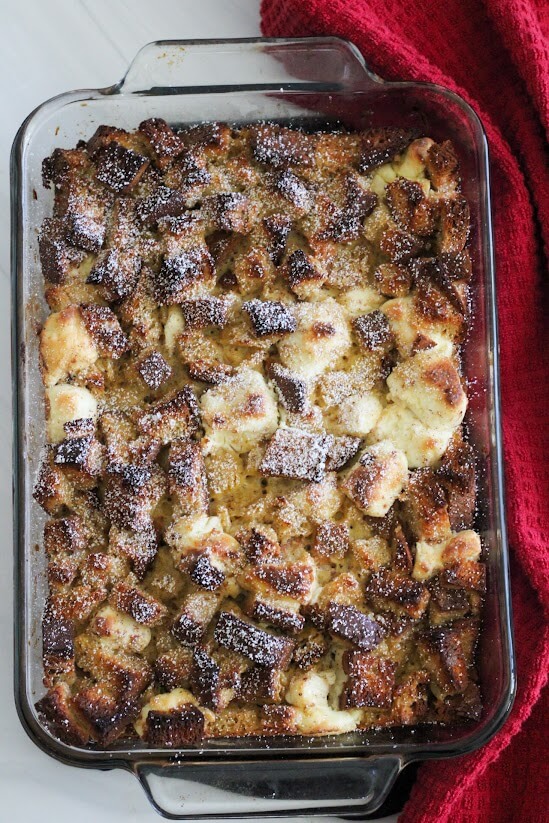
Then, the bread absorbs everything in the egg/milk mixture overnight. The next morning, take it out, pop it in the oven, and bake!
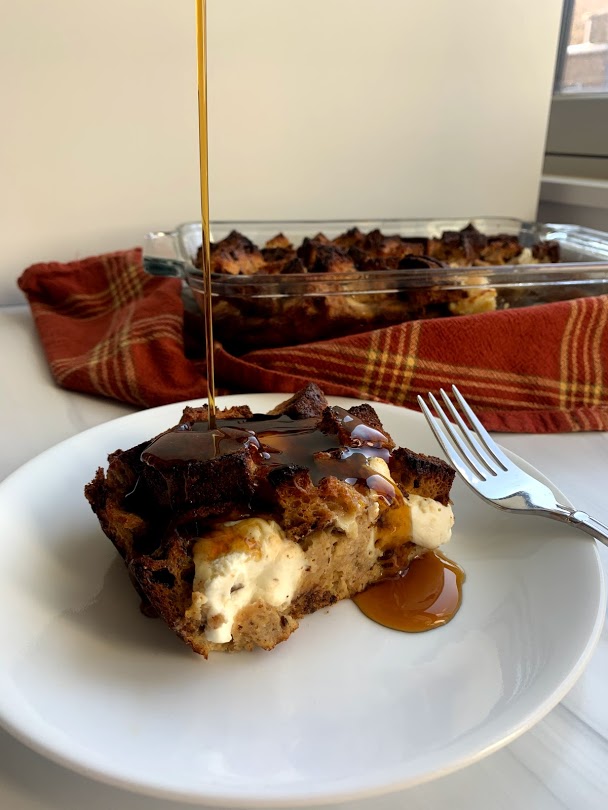
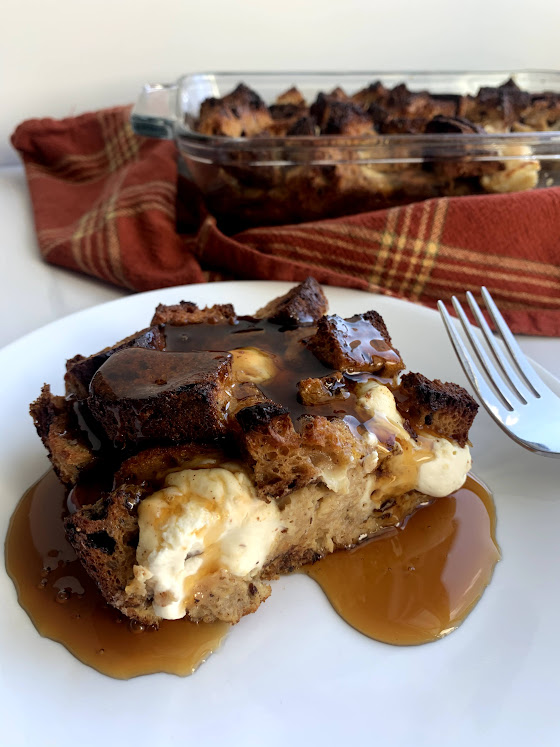
Once it bakes, it creates a crispy topping and a soft center that is so delectable!
It's so good, that you won't even need to add anything to it - and probably won't be able to tell it's gluten-free. But if you are like my husband, Dylan, and love your syrup (or you are from Vermont, like he is!) you might want additional maple syrup!
#1 Tip For Making Gluten-Free French Toast Casserole
The most important thing about this mouthwatering stuffed French toast is this:
It tastes better made the night before!
The bread (especially gluten-free bread!) does better when it has time to soak in all of the goodness in the egg mixture, like the additional cinnamon, nutmeg, vanilla, and maple syrup!
So if you want to have this for breakfast on a Sunday morning, prepare it Saturday night, cover it, and leave it in the refrigerator overnight. When you want to bake it the next morning, take it out of the fridge, remove any foil/beeswrap covering, and bake for 45 minutes.
I just found this recipe - can I still make it right now?
Of COURSE you can! While it will come out tastier if you let the bread sit overnight, I can safely say that it still tastes fabulous even if you whip this together the morning of. Or right now (I won't judge, you do you.)
How To Store Gluten-Free French Toast Casserole
This gluten-free stuffed French toast should be stored in the refrigerator. Don't leave it out! Cover it with foil or seal it inside a casserole dish with a top and eat within 2-3 days.
How To Reheat French Toast Casserole
This casserole will reheat well in the microwave to have breakfast for a few days once it is baked. You can also reheat the entire dish in the oven at 350 degrees Fahrenheit for 10-15 minutes or until your desired temperature.
Can I Freeze This French Toast?
I don't recommend freezing this. I don't think it will hold up so well due to the nature of gluten-free bread being very dense!
This is my favorite breakfast casserole - perfect for Sunday brunch, Christmas morning, or anytime you feel like stepping up your French toast game!
Looking for more cozy, gluten-free holiday recipes?
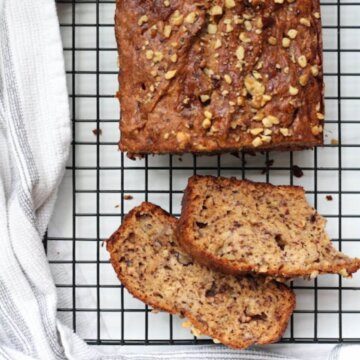
Try this cranberry orange bread for another breakfast option, or dessert. Or a snack. I won't judge!
Have fun with family decorating these gingerbread cookies with glossy icing.
Warm up with a bowl of chicken noodle soup - in less than 30 minutes.
Sit around the fireplace with a hearty bowl of beef stew with vegetables. Yum!
Here's how to make this gluten-free French toast casserole!
If you love this recipe, please leave a comment! Thanks so much!
Gluten-Free French Toast Casserole Recipe
Gluten-Free Stuffed French Toast
The most incredible breakfast you'll ever have!
Ingredients
- 10-12 slices of gluten-free bread: Cinnamon Raisin is preferred, or you can do regular GF bread (Canyon Bakehouse or Trader Joe's are my favorite!)
- 1 8 ounce package of cream cheese, cubed (use dairy-free if you need to)
- 6 eggs
- 1 ½ cups milk (cow, oat, almond, soy - whatever you prefer)
- ⅓ cup maple syrup
- ¾ teaspoon cinnamon
- ¼ teaspoon nutmeg
- 1 teaspoon vanilla
- ¼ cup brown sugar
- Maple syrup, for serving
Instructions
THE NIGHT BEFORE YOU WANT TO MAKE THIS:
Into a glass baking pan (9x11 or similar size), or a corningware, grease with butter or coconut oil. Chop up your bread into cubes.
Layer half of the bread cubes into the baking pan in an even layer. Top with the cubed cream cheese, spreading out evenly. Then, pour the remaining cubed bread on top.
This should create essentially layers similar to a cream cheese sandwich - one layer of bread, one layer of cream cheese, one layer of bread!
Whisk together the eggs, milk, maple syrup, cinnamon, nutmeg, vanilla, and brown sugar until smooth. Slowly, pour this mixture over the bread & cream cheese - trying to get as much of the bread covered in the liquid as possible. I also tap the pan a few times to make sure the liquid is distributed.
Cover the pan with foil or beeswrap and refrigerate overnight, for at least 12 hours.
THE NEXT MORNING:
Remove pan from refrigerator and remove any foil or beeswrap cover and allow it to come to room temperature. Preheat oven to 375 degrees Fahrenheit. Bake for 45 minutes. Serve warm, with additional maple syrup, or powdered sugar, if desired. Enjoy!
Notes
Dairy-Free: Yes, you can make this dairy-free. I would suggest Kite Hill Foods for dairy-free cream cheese or for a lactose-free version, Green Valley. You'd have to scoop out the cream cheese in small portions with a spoon because I've yet to find a block style of dairy-free cream cheese. But it should bake well. You can also substitute whatever dairy-free milk you prefer.
Storage: This gluten-free stuffed French toast should be stored in the refrigerator. Don't leave it out! Cover it with foil or seal it inside a casserole dish with a top for 2-3 days.
Reheating: This casserole will reheat well in the microwave to have breakfast for a few days once it is baked. You can also reheat the entire dish in the oven at 350 degrees Fahrenheit for 10-15 minutes or until your desired temperature.
Freezing: Due to the dense nature of gluten-free bread and its tendency to dry out, I would not recommend freezing this recipe. Prep it in the fridge the night before and cook the next morning. There likely won't be many leftovers!
Nutrition Information
Yield 6 Serving Size 1Amount Per Serving Calories 469Total Fat 19gSaturated Fat 10gTrans Fat 0gUnsaturated Fat 7gCholesterol 229mgSodium 248mgCarbohydrates 65gFiber 0gSugar 54gProtein 11g
The nutrition information on each recipe card is provided as a courtesy and for your convenience. The data is calculated by Nutritionix. You are encouraged to make your own calculations based on your ingredients and preferred nutritional facts calculator. While I try to make sure they are accurate, I cannot guarantee the accuracy of these calculations.
Have you tried this recipe?
Leave a review if you love it, or tell me about it in the comments below!


Lisa says
I have all of the ingredients to make this for our Christmas morning breakfast! Can’t wait. I’ll circle back with a review.
Jennifer Fitzpatrick says
Please let me know if you have further questions, Lisa! I hope you enjoy it!