

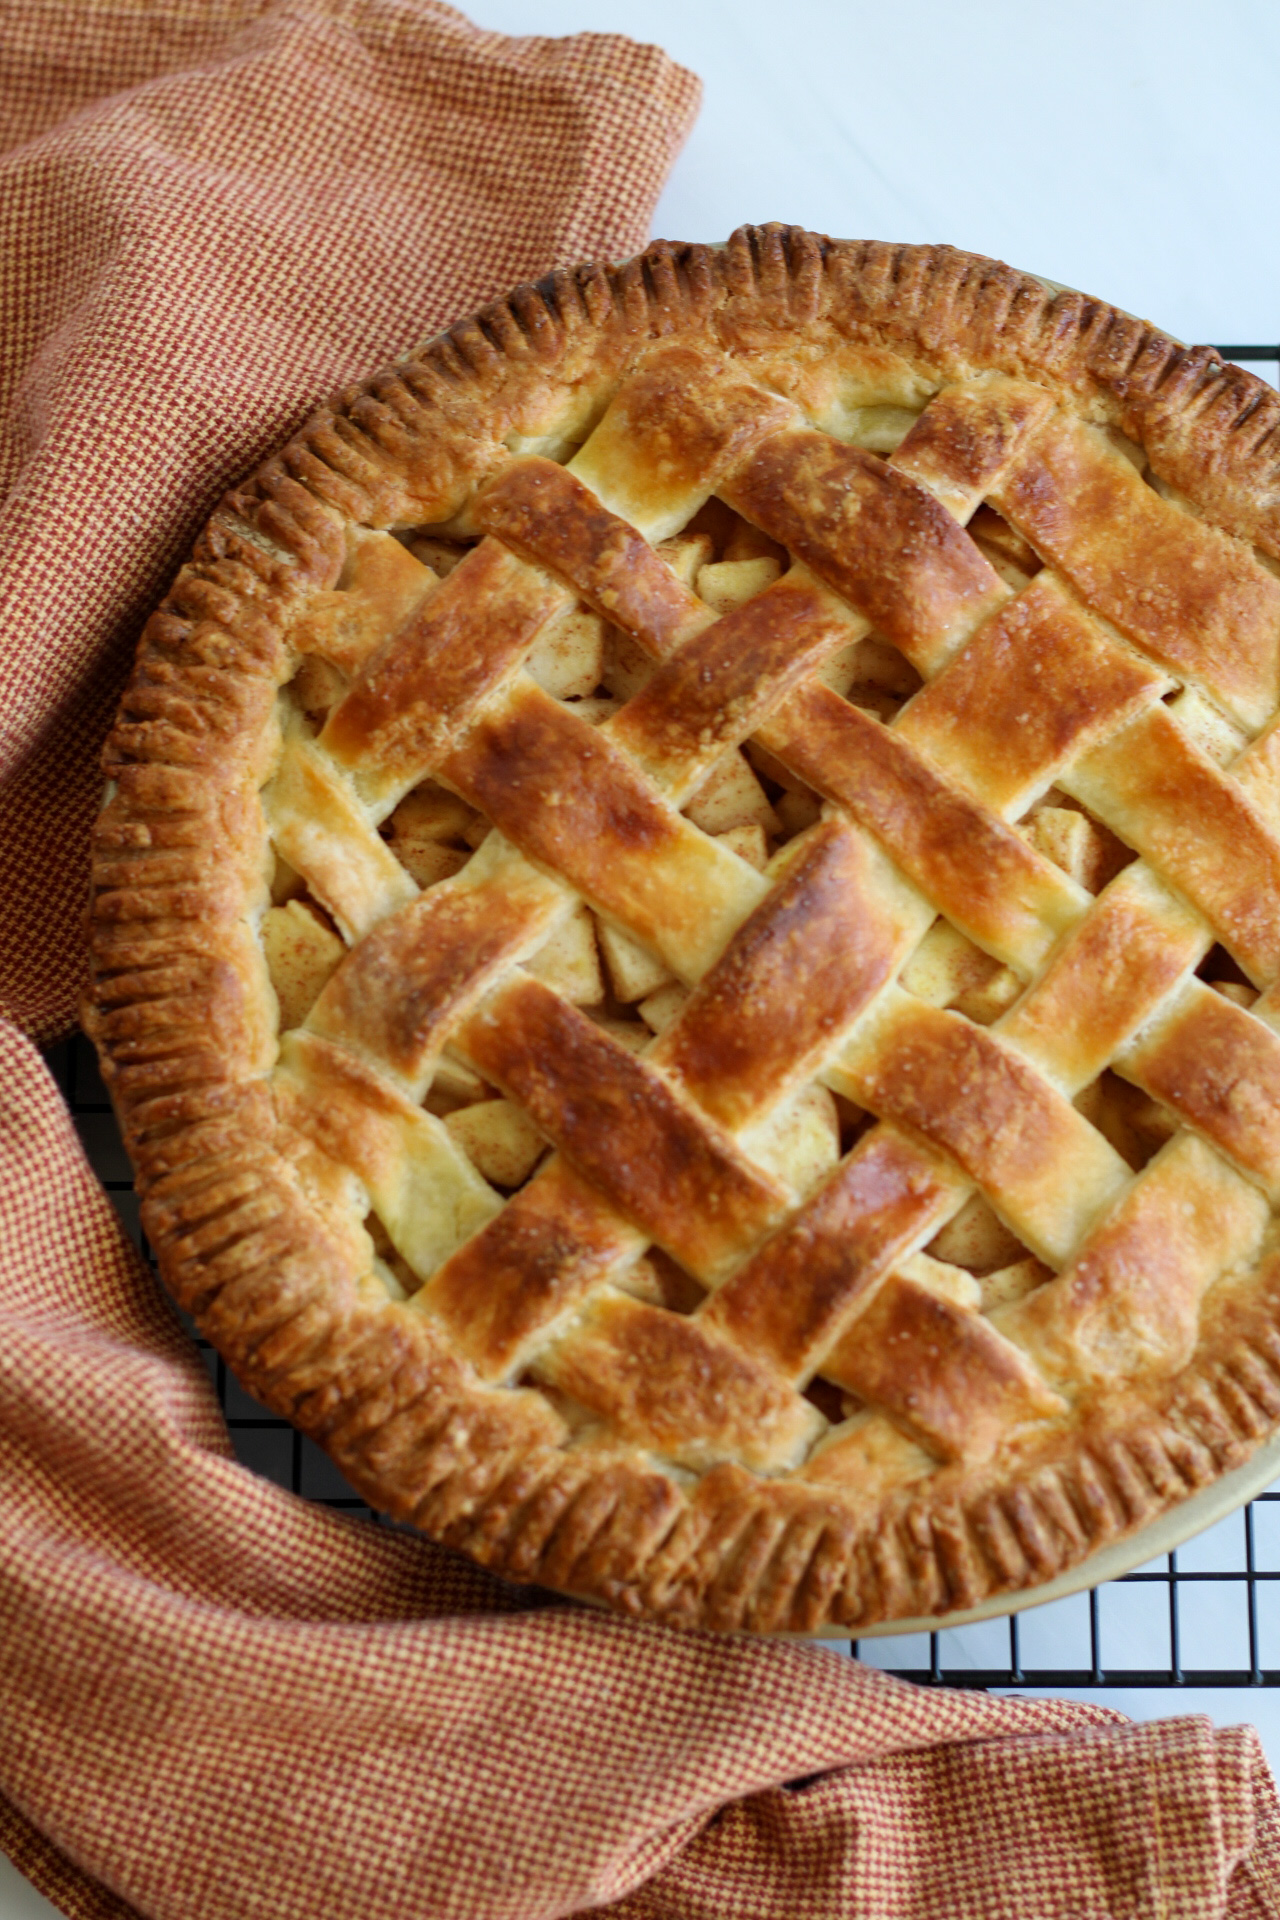
There's nothing quite like an apple pie: especially a gluten-free apple pie with a crispy pie crust and sweet & cinnamon-apple filling. This pie is SO good, you won't be able to tell there isn't any gluten. And it's the perfect dessert for the fall holidays, for Pi Day, or even for the 4th of July!
This post may contain affiliate links. Please see my disclosure page for more information. Thanks!

About This Apple Pie Recipe
Apple pies are a classic dish in American food culture. And just because you are gluten-free doesn't mean you can't enjoy a piece of good old apple pie!
This gluten-free apple pie recipe has been developed and perfected over the last ten years of baking with celiac disease. Because having dessert during family holidays is something that can be so isolating when you can't enjoy it like everyone else. And my first few apple pies all those years ago were just....okay.
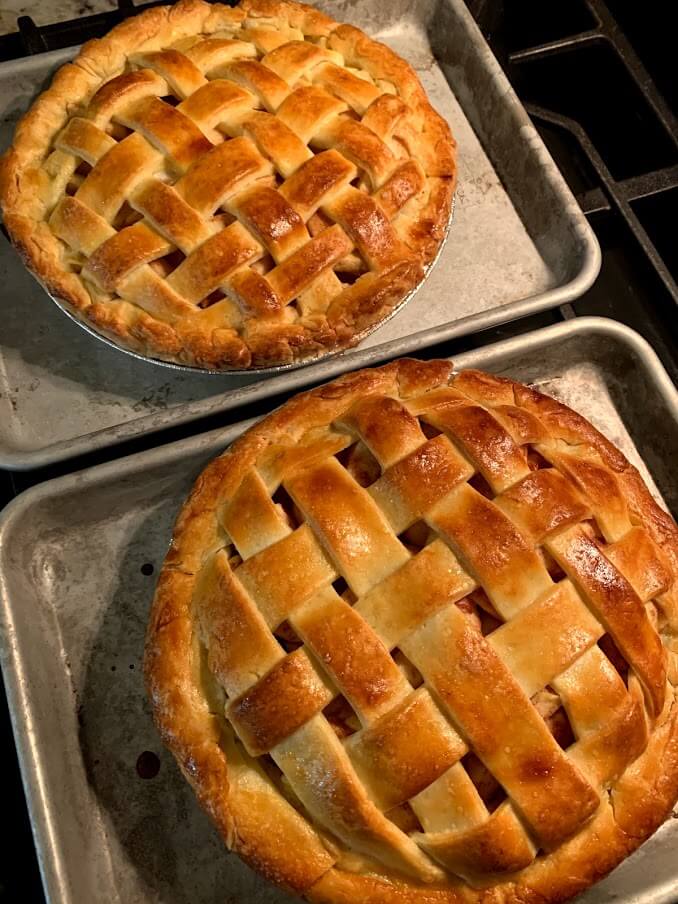
See what I mean?

The pies were good, but they didn't look how I wanted them. They still cracked in places, didn't have the flaky texture I was hoping for, and it wasn't something I was super proud to share.
But I was determined to create an apple pie that not only had that perfect, apple and cinnamon filling but with a flaky pie crust that behaved like regular pie crust too! And, I wanted this pie to be visually appealing and impressive. Something that when people saw it and later took a bite, they'd exclaim in shock, "This is gluten-free?!"
And I can proudly say that this gluten-free apple pie recipe does that! This gluten-free pie crust is a game-changer and completely improved my pies for the better. And one of the main reasons is the gluten-free flour blend that creates such a flaky, golden-brown crust!
Gluten-Free Flour Blend For Apple Pie

You need a blend of gluten-free flour to make this apple pie. In my opinion and recipe testing for gluten-free pastry and pie, Cup4Cup is the best flour for the job.
Cup4Cup has been my go-to for gluten-free baking and pastry since 2014. I recommend it and use it in numerous recipes, including gluten-free empanadas, galettes, chocolate chip cookies, and even homemade gluten-free croissants (yes, croissants!)
If you want a pie dough that rolls out like regular dough, crisps up perfectly, creates an excellent crunch, gets nice and golden brown, and DOESN'T fall apart and crumble to pieces when rolling, you need Cup4Cup flour! When combined with cold butter, egg, buttermilk, and sugar, it creates an excellent pastry dough that you can use with ease.
Note: Cup4Cup also offers a gluten-free pie crust mix, but I prefer to make the crust myself with their multipurpose flour. This flour is not dairy-free as it does contain milk powder. If you use a different gluten-free flour blend, your results may vary. I like Bob's Red Mill 1:1 Gluten-Free Baking flour as a GF & DF substitute.
Other Ingredients You Need For Gluten-Free Apple Pie
Granulated Sugar: To sweeten the pie crust and add sweetness to the apple mixture.
Kosher Salt: To balance the sweetness of the pie crust and apple mixture.
Cold, Unsalted Butter: We will use a box grater to grate this into smaller pieces, to ensure it gets distributed evenly into the pie crust mixture. We'll also top the pie with some dollops of butter for extra decadence at the end before baking.
Buttermilk: This is the liquid for the pie crust that will help it form together into a dough.
Egg: This will be used in our pie crust dough and for our eggwash before baking.
Apples: To make the filling, we, of course, need apples! You can use whatever apples you like, but I really love Jonagolds and Honeycrisp.
Lemon Juice: To prevent the apples from turning brown.
Cinnamon: The perfect spice to compliment the apples and one that smells like fall!
Vanilla Extract: For more sweetness in the apple mixture.
Tools for Gluten-Free Baking
Rolling Pin & Pizza Cutter: This helps for both rolling out the pie dough and cutting it into strips for the lattice design. Both of mine are from TJ Maxx!
A ruler or tape measure: To make sure your pie crust will fit your pie pan. Definitely recommend having a tape measure nearby!
Bench scraper: While I shape the dough with my hands, you can also use a bench scraper, like this one. It also comes in handy for other baking recipes, like croissants.
How To Make Gluten-Free Apple Pie
To make this gluten-free apple pie, first, you'll make the dough so it has time to refrigerate and firm up. While it's cooling in the refrigerator, you will assemble the apple mixture so that the juices from the apples can meld with the sugar, cinnamon, and lemon juice.
Next, you'll roll out half of the cold pie crust dough and add it to your pie tin for your bottom layer. Next, you'll put in the apple filling and top with a few dollops of unsalted butter so the filling is super rich and moist.
Finally, you can choose how you want the top of this pie crust to look. You'll roll out the remaining half of the pie dough and either drape it over the top for a double crust, or you can cut this pie crust into strips for a lattice design (instructions below).
Lastly, you'll brush the crust with an egg wash, sprinkle on a little more sugar, and put it in the oven to bake!
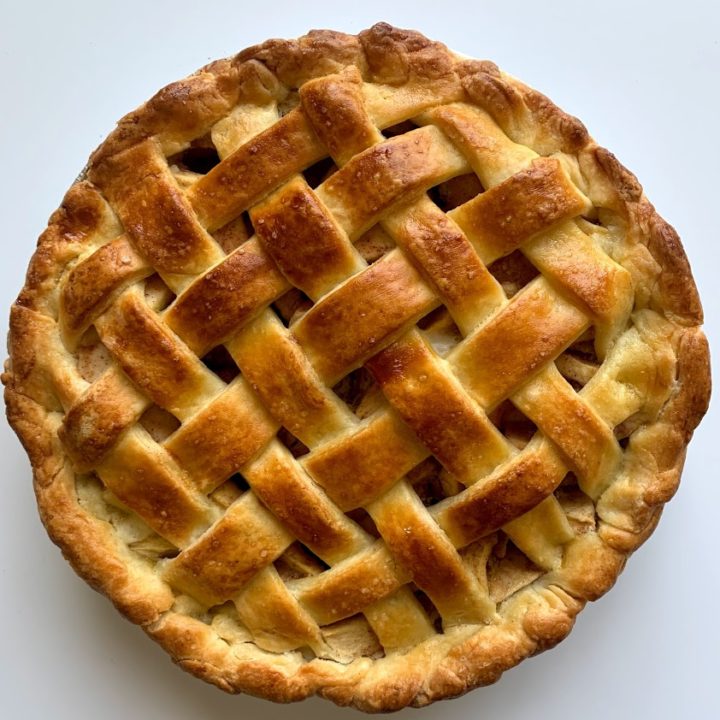
How To Lattice Pie Dough
Creating a lattice for a pie dough requires a double crust - one for the base of the pie, and the other to create the top. You don't have to lattice the pie dough, and can just top the pie with the second crust as is. Just make sure you add a few slits for steam to escape when baking.
However, it's actually quite simple to lattice pie crust when you get the hang of it, and it can create a beautiful final result! You are essentially weaving the pie crust together using strips of dough going over and under one another.
Here are the steps to follow if you want to do a pie crust lattice.
- Once you have your second pie crust rolled out, lay it flat onto your countertop. Make sure it is a little bit larger than your pie tin.
- Cut it into long 1-inch strips with a pizza cutter or sharp knife. I usually have between 10-12 strips, total.
- Take 5-6 of the strips (depending on what you have the space for) and lay them vertically going up and down across the pie, with a little space in between. You'll want to use the longer ones for the center of the pie, and the shorter ones for the sides.
- Fold backward every other strip of pie dough. For example, if you have 6 strips of dough, fold backward strips 1, 3, and 6. Then, place a pie crust strip across horizontally. (It will be under strips 1, 3, and 6, and over strips 2 and 4.) Then, fold down strips 1, 3, and 6, and you will see evidence of the lattice pattern.
- For the next strip, do the opposite. Fold backward strips 2 and 4. Place a strip of dough horizontally under strips 2 and 4 (which will be OVER 1, 3, 5). Fold down strips 2, 4 and 6.
- Continue alternating of folding backward the vertical pie dough strips, alternating as you go, weaving over and under.
Here's a video of what it looks like:
If this still doesn't make sense, take a look at the instructions I followed the instructions here from Sally's Baking Addiction. It's a lot easier than it looks, once you get started. With the leftover dough hanging over the sides of the pie, I wrapped it and curled it around while sealing it with the bottom pie crust. And if you accidentally started your horizontal rows too low (meaning you have just vertical strips at the top of your pie), feel free to add one to the top! Just make sure you make it opposite of the strip underneath it, so the lattice looks even.
Troubleshooting Common Problems With Pie Crust
Let your refrigerated pie crust sit at room temperature for about 5 minutes before rolling. After the dough has rested in the refrigerator, it will be hard and crumbly. Let it sit at room temperature for about 5-7 minutes, and then if necessary, knead with your hands a few times to get a consistent, smooth dough. Remember, there's no gluten to develop, so you won't be messing anything up. Ideally, about 5-7 minutes on the counter should be a good amount of time to start maneuvering and rolling out your dough with a rolling pin. We don't want the dough too cold (this will make it break off into pieces) and we also don't want it too warm (this will make it tear and rip). We're looking for a happy medium here, and that's when the pie crust will perform beautifully, stretching and behaving just like regular pie dough!
Don't make pastry on a hot day.
Warmer temperatures mean your pastry is going to be more difficult to work with. Stick to a cooler day to make pie crust, if possible! If at any point you notice your pie crust is becoming mushy and sticking too much to your countertop, roll it up into a ball, wrap it in plastic or parchment paper, and refrigerate again for about 15 minutes. Then try again!
Be careful how you measure your gluten-free flour.
Along the same lines, and one of my top gluten-free baking tips, if you aren't measuring for weight, then be sure to spoon your flour into your measuring cup, then level off with the back of the knife. This makes sure you get an accurate amount.
Grate the Butter for Best Results.
A tip I learned from Sally's Baking Addiction and one that allows the butter to be better incorporated into your pie crust mixture. You can use a box grater to do this or a handheld grater. And if you don't have one of these, you can instead chop the butter into very small pieces. Make sure this butter is COLD and place it in the freezer before grating to help with this!
Follow. The. Recipe.
This recipe is specifically formulated using Cup4Cup Multipurpose gluten-free flour. If you decide to change anything or substitute other ingredients, they may come out differently than expected and I cannot speak to your results. My experience is in gluten-free and dairy-free baking, but not allergy-free, vegan, or egg-free. You can always leave a comment on the recipe with any questions and I'm happy to help troubleshoot the best I can.
Refrigerate the dough if it is difficult to work with.
If you notice your pie dough is becoming mushy or that butter is leaking through your dough, or that your dough is too soft and starts ripping, it might be too warm. Wrap it in plastic wrap or parchment paper and place it back in the refrigerator for 15-20 minutes to cool. Then remove and try again. Trust me - don't try to force the dough to do what you want when it's too warm. Be patient, refrigerate, and try again. It definitely helps!
Flour your work surface.
The gluten-free pie crust dough has a tendency to stick. Remember to use gluten-free flour on your hands and rolling pin and on your work surface. Lift the dough frequently (pick it up completely off the countertop) and reflour the surface with gluten-free flour so it doesn't stick.
Common Questions With Gluten-Free Apple Pie
Can I make this gluten-free apple pie dairy-free too?
Yes, you can, but I cannot speak to your results. You will need to use a different gluten-free flour blend, as Cup4Cup Multipurpose contains milk powder. I recommend Bob's Red Mill 1:1 Baking Flour as a solid gluten-dairy-free alternative. You will also need to replace the butter with vegan butter, and the buttermilk as well. I've found the best substitute for dairy-free buttermilk is equal parts dairy-free yogurt and dairy-free milk.
Please note, that I can digest dairy and do not normally bake pastry only gluten-free, not dairy-free. If you have questions or need help troubleshooting, please leave a comment and I will do my best to help! Another option would be to just use a pre-made pie crust that is gluten and dairy-free, like Wholly GF, which is allergy-friendly.
Can I make the pie dough ahead of time?
Absolutely! You can prepare the pie crust dough early. Refrigerate at least 1 hour and up to 3 days in advance, or freeze for up to one month. Defrost in the refrigerator when you are ready to assemble your pie.
Can I prep the pie ahead of time? How should I store it?
Yes, you can! You can prepare this gluten-free apple pie in advance and keep it in the freezer until ready to bake. Be sure to wrap it heavily in plastic wrap/foil and keep it in a sealed plastic bag. Keep it sealed in the freezer for up to 3-4 months. Then, when ready to bake, remove it from the freezer and place on a parchment-lined baking sheet. Then follow the instructions for baking in the recipe card below.
You can also bake the entire pie in advance and then freeze it for storage. Store it the same way as listed above. To reheat, place uncovered on a parchment-lined baking sheet at 350 degrees Fahrenheit and reheat for 30 minutes or until warmed through.
How To Serve Gluten-Free Apple Pie

Most people enjoy apple pie with vanilla ice cream or whipped cream. And I have to agree! Truthfully, I always go for ice cream. Just make sure the pie is warm before adding the ice cream for the optimal bite!
If you are serving this apple pie for Thanksgiving, might I also suggest serving it alongside some other holiday desserts, such as this gluten-free pumpkin pie, or gluten-free cranberry orange bread? Both are crowd-pleasers and beautiful desserts that will have people wondering how you made it gluten-free and still taste so good!
How to Store Gluten-Free Apple Pie
For best results, this gluten-free apple pie should be covered with foil and kept in the refrigerator for up to 3-4 days. You can reheat in the microwave or in the oven on broil. Then, if you still want to keep or store the pie beyond that, cover it in plastic wrap and place it in a freezer bag to store in the freezer. Reheat it in the oven at 350 degrees for 30 minutes.
More Fall Gluten-Free Baking Recipes
Want to bake another pie but without the homemade dough? This gluten-free pumpkin pie uses a storebought crust so it's super easy.
Looking for a gluten-free scone recipe? Be basic and enjoy it with these gluten-free pumpkin scones and maple frosting.
Feel like an easy quickbread? This banana bread with walnuts is a winner!
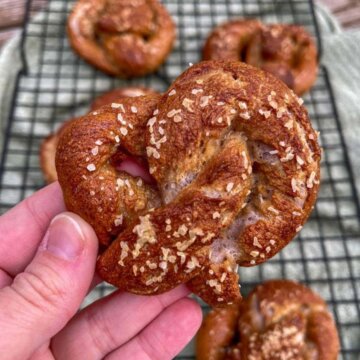
Ready to take your baking skills to the next level? Try these delightful, buttery, and flaky gluten-free croissants.
Discover all the gluten-free baking recipes on the blog right here.
Here's the recipe for this fabulous gluten-free apple pie.
If you love this recipe, please leave a comment! Thank you so much!
Gluten-Free Apple Pie Recipe
Gluten-Free Apple Pie
Recipe Adapted from Cup4Cup
Ingredients
For the gluten-free pie crust (makes 2 crusts)
- 3 cups Cup4Cup gluten-free multipurpose flour
- 2 tablespoons granulated sugar
- 1 teaspoon kosher salt
- 1 cup (2 sticks) of unsalted butter, grated
- 1 large egg
- ½ cup cold buttermilk
For the apple filling
- 8-10 medium apples, peeled & sliced into chunks of even size
- 2 tablespoon lemon juice
- ¼ cup granulated sugar
- 1 teaspoon cinnamon (or do 1 ½ teaspoon if you want more!)
- ½ teaspoon kosher salt
- 3 tablespoon Cup4Cup flour
- 1 teaspoon vanilla extract
- 2 tablespoon unsalted butter, cut into cubes
- 1 egg, slightly beaten, mixed with 1 tablespoon water
- granulated sugar, for sprinkling
Instructions
First, prepare the apple mixture so it has time to let the spices meld with the flesh of the apples. Combine the sliced apples, lemon juice, granulated sugar, cinnamon, salt, Cup4Cup flour, and vanilla and mix with a spoon. (Don't add the butter just yet!) Make sure the apples are coated evenly. Set aside at room temperature while you prepare the pie crust.
To prepare the pie crust, first place your butter in the freezer for 5-10 minutes so it is super cold (the colder the butter, the better your pie crust pastry!).
Place the Cup4Cup flour, sugar, and salt in a medium bowl and whisk to combine. Then, grate the butter using a box grater (make sure it is COLD). This will allow it to incorporate better into the dry ingredients. Add the grated butter to the mixture and combine using a fork or pastry cutter until it resembles a coarse meal. (You can also use a food processor for this part).
If you used a food processor for the previous step, pour the flour/butter mixture into a large bowl to continue. Then, in a separate small bowl, whisk together the egg and buttermilk until smooth.
Make a well in the center of the flour/butter mixture (a large hole), and begin pouring in the buttermilk and egg, whisking with a fork as you add. Continue mixing until a dough begins to form, and feel free to switch from the bowl to a clean countertop to roll the dough into a smooth ball. Use your hands, and keep mixing to make sure everything is incorporated and there aren't any crumbs or flour left on the bottom of the bowl. Don't worry, there is no gluten developing so you won't overmix. Then, wrap the dough in plastic wrap or bee's wrap and refrigerate for at least 30 minutes.
After 30 minutes, remove the dough from the refrigerator and cut it in half. Place the second half back in the refrigerator while you roll out the bottom crust. Preheat the oven to 350 degrees Fahrenheit.
*If the dough is stiff or crumbly when coming out of the refrigerator, wait until it comes to room temperature (about 10 minutes) and then knead it a few times with your hands before rolling with a rolling pin. The dough should become very soft and flexible, but if it's still too cold, it will be difficult to work with. Give it time to come to room temperature before you start rolling it out to prevent breakage.
Dust a clean countertop with Cup4Cup flour, and roll out the dough with a rolling pin into a 12-inch circle, about ⅛-inch thick, lifting often and redusting with additional gluten-free flour to prevent the dough from sticking.
Drape the crust over a 9-inch pie tin and fit it into the pan. Don't remove any excess dough hanging over the side - you will use it to create a seal with the top layer of crust. Next, fill the pie. Drain the apple mixture but reserve the liquid. Pour the apple mixture onto the crust and spread out evenly, then pour the reserved liquid over the top. Top with the butter pieces all over.
Finally, roll out the remaining half of the pie crust dough. Remove from the refrigerator and follow the same steps as before for rolling it out. If you would like to make a lattice design, cut it into 1-inch wide strips. Weave the strips into a lattice on top of the apple filling. If you are not doing a lattice design, roll the crust out like before and drape it over the top of the pie. Additional instructions for latticing are in the blog post so scroll up!
To seal the pie crusts together for a lattice design, simply press the bottom edge and lattice edge together, trimming any excess. You can also use a fork or your fingers to make a design on the edge of the crust.
If you are making a simple doubl crust apple pie (without the lattice), simply place your second rolled out pie dough crust over the pie. Leave about 1 inch over the side and trim any excess. Roll the edges of the dough underneath itself to form a rounded edge. Using your fingers, crimp the edges together, and use the tines of a fork or your fingers to create a design along the edge.
With a lattice design, there are plenty of pockets for air to escape. If, you are choosing to do a regular pie crust topping (without the lattice), make sure you make at least 3 slits in the crust to allow for steam. Use a sharp knife and make at least 3 holes in the dough, about 1 inch long.
Finally, with whatever top crust you decided, be sure to brush the pie crust all over with egg wash and sprinkle with additional granulated sugar, if desired.
Place the pie on a parchment-lined baking sheet and bake in a preheated oven at 350 degrees Fahrenheit for about 45 minutes to 1 hour, until the top is golden brown and the filling is bubbly.
Cool the pie completely on a wire rack before serving. It goes perfectly with vanilla ice cream or homemade whipped cream. Enjoy!
Notes
Let your refrigerated pie crust sit at room temperature for about 5 minutes before rolling. After the dough has rested in the refrigerator, it will be hard and crumbly. Let it sit at room temperature for about 5-7 minutes, and then if necessary, knead with your hands a few times to get a consistent, smooth dough. Remember, there's no gluten to develop, so you won't be messing anything up. Ideally, about 5-7 minutes on the counter should be a good amount of time to start maneuvering and rolling out your dough with a rolling pin.
Preparing the Dough Early
You can prepare the pie crust dough early. Refrigerate at least 1 hour and up to 3 days in advance, or freeze for up to one month. Defrost in the refrigerator.
Keep it Cold
Pie dough needs to be cold to roll out best. If you notice yours is sticking together, or getting mushy, place it back in the refrigerator to firm up for 20 minutes and try again.
Other gluten-free flour
In my experience, Cup4Cup is the best for gluten-free pies and pastries. If you use another gluten-free flour blend for this recipe, your results could vary.
Dairy-Free:
If you are looking to make this pie dairy-free, please see the full recipe post for instructions on how to do this and what substitutions/changes to make.
Freezing & Make Ahead:
You can freeze the pie before baking, or after baking. Wrap tightly in plastic wrap/in a plastic bag and keep sealed in the freezer for up to 3-4 months. If it was previously baked, reheat in the oven at 350 degrees uncovered on a parchment-lined baking sheet for about 30 minutes, or until warmed through. If not previously baked, follow the instructions listed here.
Nutrition Information
Yield 8 Serving Size 1Amount Per Serving Calories 606Total Fat 30gSaturated Fat 18gTrans Fat 0gUnsaturated Fat 10gCholesterol 120mgSodium 465mgCarbohydrates 81gFiber 7gSugar 34gProtein 8g
The nutrition information on each recipe card is provided as a courtesy and for your convenience. The data is calculated by Nutritionix. You are encouraged to make your own calculations based on your ingredients and preferred nutritional facts calculator. While I try to make sure they are accurate, I cannot guarantee the accuracy of these calculations.
Do you like pie?
What's your favorite kind?
Tell me in the comments below!


Corinne L says
Hi! I’m making this ahead of time before traveling. Would you recommend freezing the pie before or after baking?
Jennifer Fitzpatrick says
Hi there, I've listed information about freezing this pie in the recipe card and post itself! Let me know if you still have further questions!
Emma-Leigh Tyndall says
What kind of apples do you use?
Jennifer Fitzpatrick says
Please check the post! I mention what apples I use under "Other Ingredients You Need For Apple Pie".