Yes, gluten-free soft pretzels are here! And they have the texture you're craving. Let's make them!
This post may contain affiliate links. Please see my disclosure page for more information. Thanks!
About This Gluten-Free Soft Pretzel Recipe
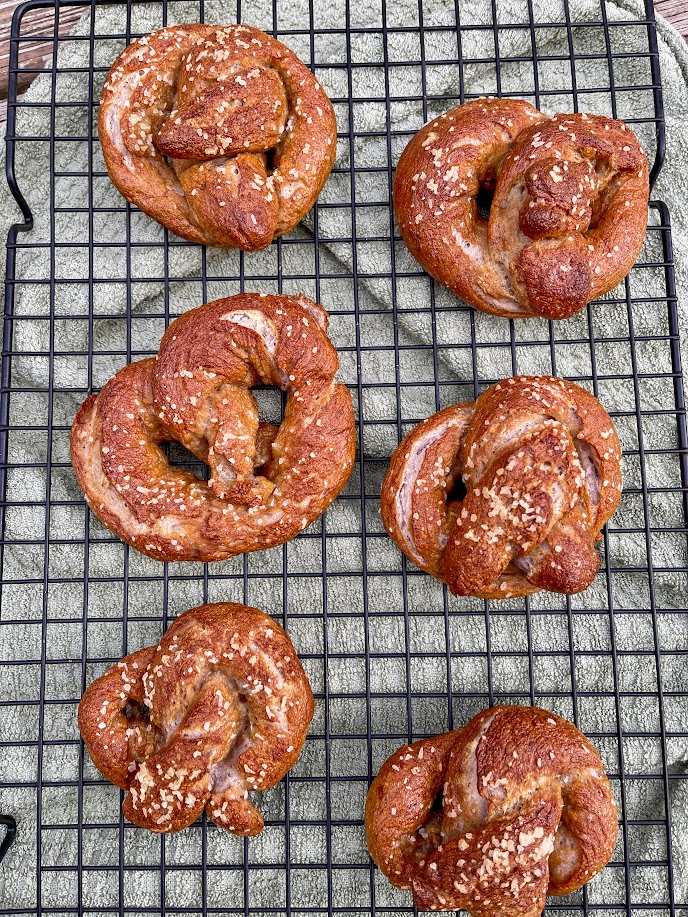
The one thing that is REALLY hard to find in celiac-safe form is a gluten-free soft pretzel. They aren't commonly found in most gluten-free bakeries, and I've yet to find a frozen version that I really like. So about three years ago, during the height of the COVID pandemic and lockdown, I set out to try and make my own version while creating a series of other bread pastry recipes inspired by traveling the world.
Here's what that original pretzel recipe looked like:

To be honest, they were okay. But they were a bit too doughy in my opinion, and didn't have the texture I was hoping for. While they did the trick to satisfy a soft pretzel craving, they still could have been better.
Then, I sort of forgot about them for a while, (try about 3 years, oops!). But then one day, when I had a craving for them again during my second trimester of pregnancy, I remembered how much my gluten-free croissant recipe improved using psyllium husk powder. And I thought maybe, just maybe, this could be the key to improving these pretzels!
So I got back into the kitchen and began recipe testing again.
And this time? I got it right. Oh boy, did I get it RIGHT!

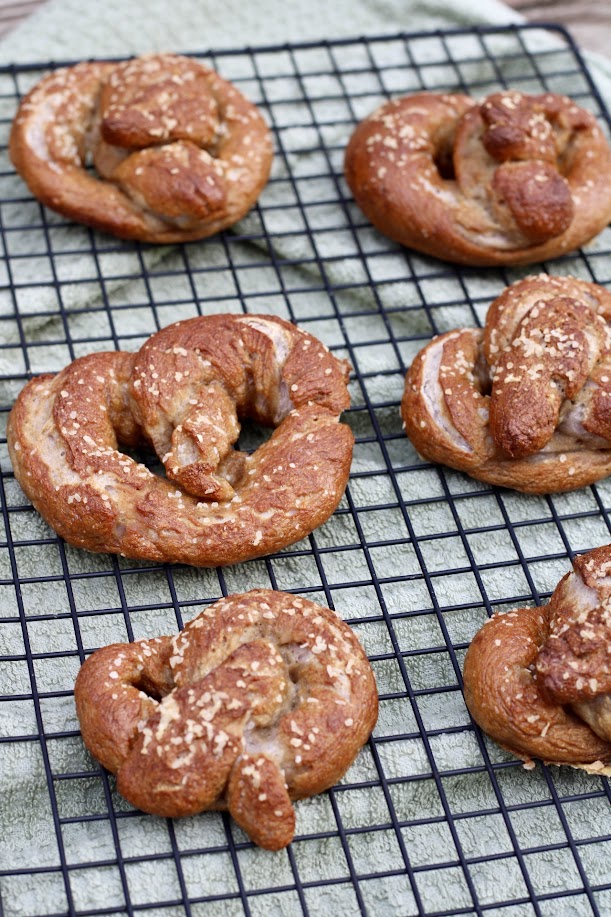
These pretzels have the EXACT pull-apart texture I was hoping for, with a crispy exterior and soft interior. They get perfectly golden brown in the oven and taste amazing with various toppings - even just sea salt! And when my non-celiac husband Dylan couldn't stop eating them, I knew I had a winner.
So that's why it's taken me so long to get this written on the blog. But these gluten-free soft pretzels are here, so let's make them!!
Ingredients You Will Need
Dough Ingredients

Yeast: Active dry or instant: I've tried both for this recipe and they both work fine! This helps give our pretzel dough rise and texture.
Brown Sugar: Light or Dark: Again, I've used both, and they are both fine.
Warm Water: We need this to help activate the yeast if using active dry yeast, but also for liquid content and moisture in the dough.
Gluten-Free Flour Blend: I use Cup4Cup Multipurpose Gluten-Free Flour in the majority of my recipes, especially baking. I use it here as well. Please scroll down for alternatives. I buy this on Amazon or at Stop & Shop/Target.
Psyllium Husk Powder: KEY! You need psyllium husk powder to create the soft and crunchy pretzels we are hoping for. Make sure you buy the powder, not the whole husks. I buy mine on Amazon.
Regular Salt: Regular granulated salt will be added to the dough for flavor. We will use a different, thicker salt to season the pretzels before baking.
Baking powder: Because without gluten, we need some help! Baking powder helps provide lift to the dough. Make sure it is gluten-free.
Egg: You'll need 1 egg for the dough recipe, again for moisture and lift.
Other Ingredients:
Olive Oil: We'll use this to coat the bowl the dough will rise in, only about a tablespoon. I use extra virgin olive oil, but any kind will do fine.
Baking Soda: Crucial for boiling the pretzels and giving them that optimal crunchy exterior. See the recipe card & notes about how to do a baking soda bath.
Sea salt/Kosher salt, or other toppings: This is where you can have fun with these pretzels! I usually use Kosher salt or flaky sea salt for sprinkling, but you could also do everything but the bagel seasoning, cinnamon sugar, or whatever you like.
Gluten-Free Flour For Soft Pretzels
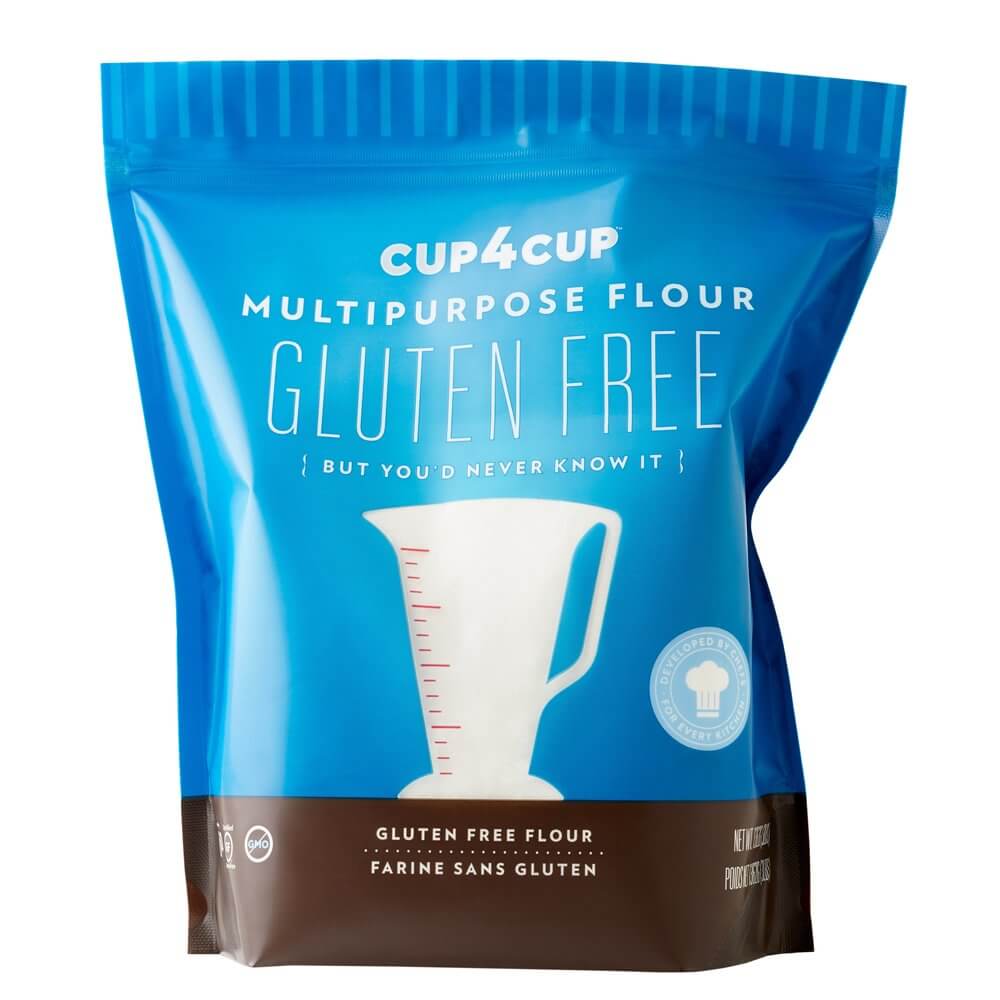
Gluten-Free Flour: I use Cup4Cup multi-purpose gluten-free flour for this recipe. It is my #1 choice for cookies, pastries, and yeast-based baked goods. Cup4Cup has given me great success in the kitchen over the last eight years, helping me to create delicious croissants, empanadas, naan, chocolate chip cookies, pierogi, bagels, and more. Please note if you use a different gluten-free flour your results may vary.
How To Make Gluten-Free Soft Pretzels


Making soft pretzels takes time, but can be broken down into 5 steps: Mixing the dough, letting the dough rise, shaping the pretzels, boiling the pretzels, and then adding toppings/baking. I know that sounds like a lot of steps, but I promise you the end results are WORTH IT.
First, you'll make the dough. You'll whisk together the gluten-free flour, baking powder, salt, and psyllium husk powder in a bowl and set it aside. Then, for the wet ingredients, you'll combine the yeast in a bowl with warm water and brown sugar. Into a stand mixer, you'll pour the yeast mixture and mix in the egg, followed by the dry ingredients, until a sticky dough forms.

Then, you'll place the dough in an olive-oil-lined bowl and cover it to let it rise for about 45 minutes to 1 hour, in a warm place. I usually place mine on/near my preheated oven in the wintertime, or just in a sunny window/warm place during the warmer months.

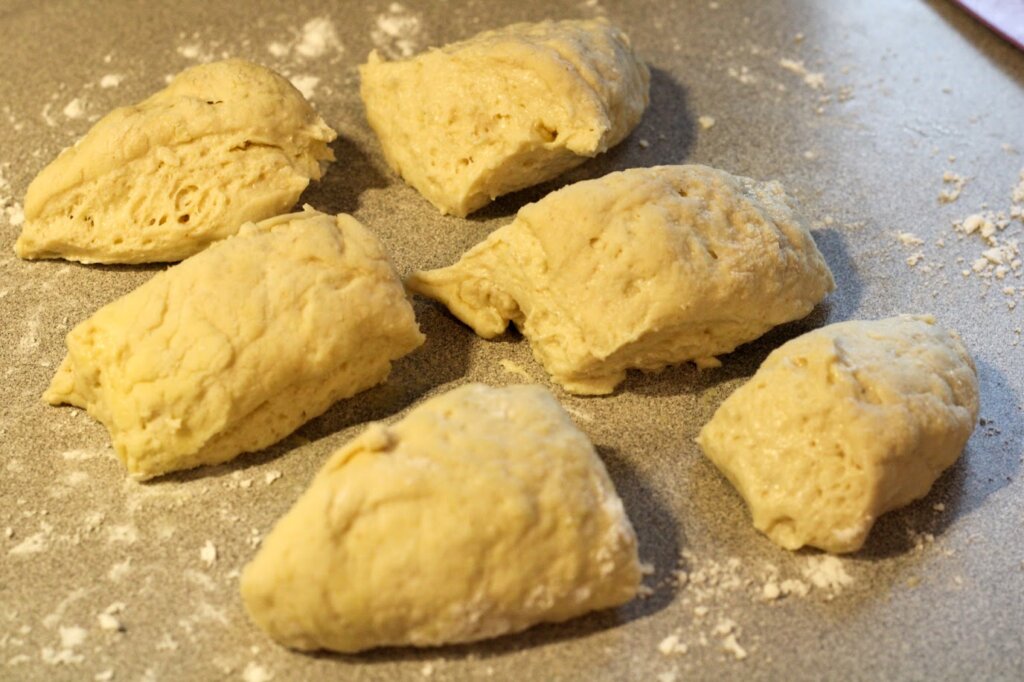
Once the dough has risen, it's time to shape them. You'll cut the dough into six equal pieces. With each piece, roll into a log shape about 10-12 inches long. Then, make a "U" shape with the log, then take the two ends and cross over each other to make a pretzel (you can crossover more than once if you have excess dough).


The last step before baking (almost there!) is to boil the pretzels in a baking soda bath. This is what gives them that nice crunch and exterior texture (and a technique I also use in my gluten-free bagel recipe that makes a HUGE difference!). This step is quick, as the pretzels only boil for about 20 seconds each. We don't want to go any longer, or the pretzels will have a metallic taste. Yuck!


Finally, it's time to brush with an eggwash, add your toppings like flaky sea salt, and bake! The pretzels bake quickly, only about 15-17 minutes. Then it's time to break them open and EAT!

Tools/Equipment For Making Pretzels
KitchenAid Stand Mixer: I love my stand mixer, and it is probably one of my most prized possessions. Mixing the dough is so much easier with one of these and a paddle attachment. You could try a hand mixer, but the dough is very sticky and would likely get caught in the beaters. You could also incorporate this by hand with a wooden spoon and a lot of arm exercise.
Nordic Ware Pans: I use these pans for everything - roasting vegetables, baking cookies, and making these pretzels. Get the jelly roll pans - they are baking sheets with sides so that nothing will spill over the sides. (I've learned that lesson the hard way and have a dirty oven to prove it!)
Silpat Liners: Rather than use parchment paper, invest in some reusable silicone liners for baking. Silpat is well-known in the baking industry and they last for years. I use them every time I bake something!
Common Questions When Making Pretzels
What is Psyllium Husk Powder?
Psyllium is a plant known for being both a strong source of fiber and a food thickener/binder. The husks, or powdered form of the husks, make a big difference in gluten-free baking and can provide yeast-based baked goods with the texture we miss due to the lack of gluten!
For this recipe, you need psyllium husk powder, not whole psyllium husks. Whole psyllium husks require you to mix them with water to create a gel for thickening baked goods. This is not something I do in my recipes, and for simplicity, I get the powder. You can find this at Whole Foods, on Amazon, or even in supermarkets.
Can I Make These Pretzels Dairy-Free?
You can, but my recipes are all 100% gluten-free due to celiac disease. I provide dairy-free modifications when possible. Due to the nature of the gluten-free flour blend for this recipe (Cup4Cup), which contains milk powder, you would have to substitute a different gluten-free flour for these. I would suggest GF Jules (gluten and dairy-free) which has a similar composition and ingredients, but without the dairy.
Do I Have to Boil The Pretzels?
You *don't* have to, but you should! It will make a HUGE difference in the texture of your gluten-free pretzel. When I first started experimenting with gluten-free pretzels back in 2020, I didn't boil them and only baked them. And the results were...meh. This is probably one of the quickest steps in the pretzel-making process, but SO worth it! I also do this in my gluten-free New York style bagel recipe for incredible crunch!
So what is a baking soda bath?
This is just boiling water and baking soda, and you'll submerge the pretzels into it. We want a nice rolling boil to ensure the pretzels don't fall apart when boiling. You'll place them gently into the water with a slotted spoon and only leave them in for about 20 seconds. Don't go over that or the pretzels can taste metallic! Setting a timer on your phone helps. Then, just remove the pretzels to a baking sheet lined with a silicone liner/parchment paper. After that, add the eggwash, seasonings, and bake!
Can I Use Instant Yeast Instead of Active Dry?
Yes! To be honest, I've tested this recipe with both active and instant yeast. Just make sure it says gluten-free yeast and there are no additives.
The difference between instant and active dry yeast is that instant yeast can be added right to a recipe. Active dry yeast means it has to be, you guessed it, activated, in order for the yeast to work its magic. Activating yeast involves adding active dry yeast to water with sugar and letting it sit for 10 minutes covered with a towel until bubbly.
Please note: Whether you use instant or active dry in this recipe, YOU STILL NEED THE WATER AND BROWN SUGAR. The water is crucial to provide moisture in the recipe, and the brown sugar adds some sweetness to the dough.
Baking Tips & Troubleshooting
Be careful how you measure your gluten-free flour.
Along the same lines, and one of my top gluten-free baking tips, if you aren't measuring for weight, then be sure to spoon your flour into your measuring cup, then level off with the back of the knife. This makes sure you get an accurate amount.
Give yourself a good amount of time.
This gluten-free pretzel recipe has many steps. Allow a good 2 hours to make them from start to finish.
Follow. The. Recipe.
This recipe is specifically formulated using Cup4Cup Multipurpose gluten-free flour. If you decide to change anything or substitute other ingredients, they may come out differently than expected and I cannot speak to your results. My experience is in gluten-free and some dairy-free baking, but not allergy-free, vegan, or egg-free. You can always leave a comment and I'm happy to help troubleshoot the best I can.
How To Serve Soft Pretzels
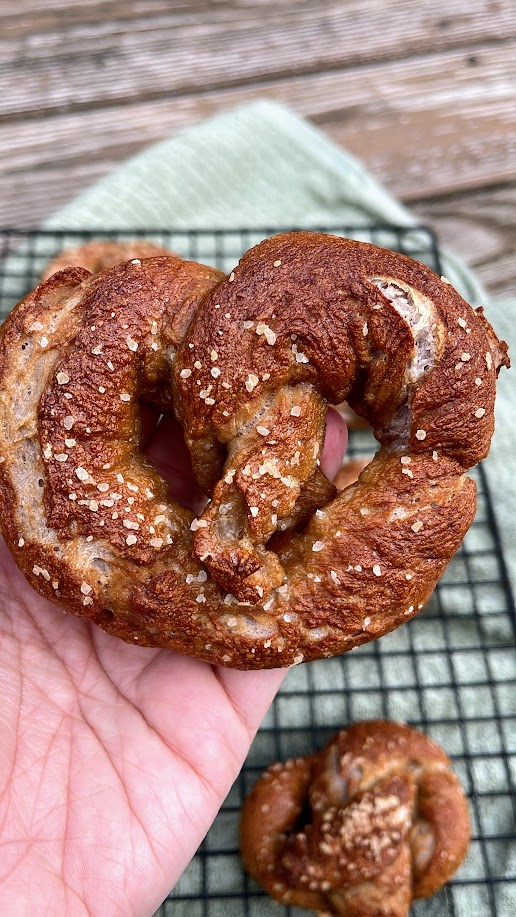
I honestly eat them as soon as they are cool enough to bite into once out of the oven! I still haven't even tried dipping them into anything because, as I mentioned, they are that good. But some ideas would be to enjoy these dipped in your favorite mustard, honey mustard, or cheese sauce! Or, serve them as part of an appetizer platter or game day snack board during football season along with some jalapeno poppers, loaded nachos, or crockpot pulled pork!
How To Store Soft Pretzels
Gluten-free baked goods tend to harden over time, so make sure you keep these in a sealed container at room temperature. If they do harden, pop them in the microwave for 10-15 seconds to regain the soft texture you are hoping for. These will keep in a sealed container at room temperature for 2-3 days.

Here's the full recipe for gluten-free soft pretzels!
If you love this recipe, please leave a comment! Thank you so much!
Gluten-Free Soft Pretzels

Gluten-Free Soft Pretzels
The soft yet crunchy pretzels of your gluten-free dreams!
Ingredients
For the pretzel dough
- 1 ½ teaspoons instant or active dry yeast
- 1 ½ teaspoons brown sugar (light or dark)
- ¾ cup warm water
- 1 ½ cups Cup4Cup Multipurpose Gluten-Free Flour (more for dusting)
- 1 teaspoon psyllium husk powder
- ½ teaspoon regular granulated salt
- ½ teaspoon baking powder
- 1 egg
For the baking soda bath
- 6 cups water
- 6 Tablespoons baking soda
For finishing the pretzels
- 1 egg, beaten with 1 Tablespoon of water
- Flaky sea salt or Kosher salt
Instructions
Combine the yeast, brown sugar; and warm water in a small bowl. Mix lightly and place a kitchen towel over the bowl. Let it sit for 10 minutes while you prepare the other ingredients. Please be advised if you are using active dry yeast, the yeast should bubble up and be foamy after 10 minutes (This is called activating the yeast). If it isn't, it has expired and will not work for the recipe. For instant yeast, just combine with warm water and brown sugar and let sit. You will not see the bubbles and foam, just some cloudy water.
Next, combine your dry ingredients in a bowl - gluten-free flour, salt, psyllium husk powder, and baking powder. Whisk and set aside. Into the yeast mixture crack the egg and beat with a stand mixer on low until combined. Add the flour mixture ½ cup at a time, ensuring everything is combined and incorporated by beating again on low until a sticky dough forms.
Place the dough in an olive oil-lined bowl (about 1 TBSP) and cover with a kitchen towel. Place in a WARM SPOT (next to an oven, in a sunny window) for 45 minutes until risen.
Lightly flour a countertop and flour dough as needed. Cut dough into 6 equal pieces. Roll out each piece into a log shape. Make a “U” shape and cross the ends over the center and press down to make a pretzel shape. Place on a parchment/silpat-lined baking sheet.
Boil 6 cups of water and bring to a boil. Add baking soda but be careful, it will bubble a bit. Carefully submerge each pretzel in the baking soda bath for 20 seconds each but don't go over this time! Make sure the water stays at a solid boil to ensure the pretzels don't fall apart. Keep a timer on your phone for submerging the pretzels - going over the 20 second mark can give them a metallic taste, so boil with care!
Remove to the same baking sheet with a slotted spoon. Brush boiled pretzels with egg wash and sprinkle with kosher/sea salt or other toppings. Bake 15-17 minutes at 425 F or until golden brown. Enjoy!
Notes
Gluten-Free Flour: I use Cup4Cup multi-purpose gluten-free flour for this recipe. It is my #1 choice for cookies, pastries, and yeast-based baked goods. Please note if you use a different gluten-free flour your results may vary.
Dairy-Free: You can, but my recipes are all 100% gluten-free due to celiac disease. Due to the nature of the gluten-free flour blend for this recipe (Cup4Cup), which contains milk powder, you would have to substitute a different gluten-free flour for these. I would suggest GF Jules (gluten and dairy-free) which has a similar composition and ingredients, but without the dairy.
Storage: Gluten-free baked goods tend to harden over time, so make sure you keep these in a sealed container at room temperature. If they do harden, pop them in the microwave for 10-15 seconds to regain the soft texture you are hoping for. These will keep in a sealed container at room temperature for 2-3 days.
Nutrition Information
Yield 6 Serving Size 1Amount Per Serving Calories 107Total Fat 2gSaturated Fat 1gTrans Fat 0gUnsaturated Fat 1gCholesterol 62mgSodium 4177mgCarbohydrates 18gFiber 1gSugar 1gProtein 5g
The nutrition information on each recipe card is provided as a courtesy and for your convenience. The data is calculated by Nutritionix. You are encouraged to make your own calculations based on your ingredients and preferred nutritional facts calculator. While I try to make sure they are accurate, I cannot guarantee the accuracy of these calculations.
Do you miss soft pretzels?
What would you dunk these into, or what toppings would you use?
Tell me in the comments below!

Comments
No Comments