Need something creative to do in quarantine? Here are five ways to scrapbook your travel memories!
This post may contain affiliate links. Please see my disclosure page for more information. Thanks!
About This Blog Post
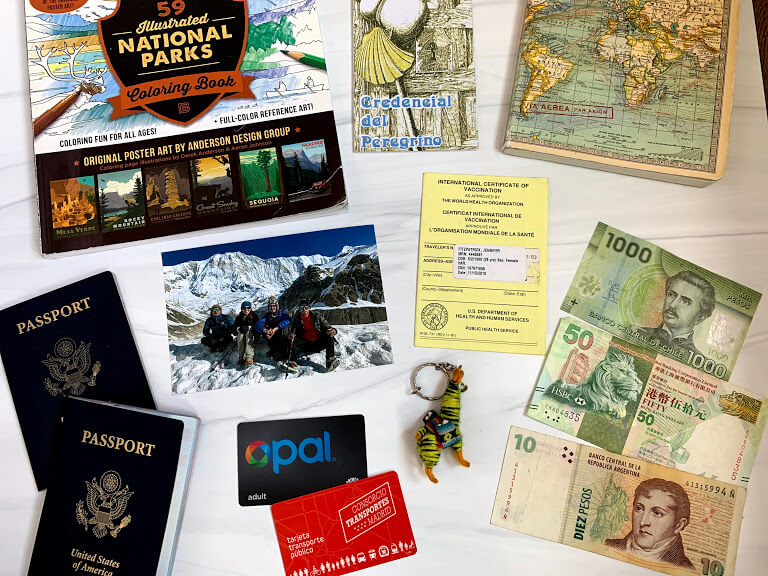
One of my favorite aspects of traveling is that it doesn't end when you come home. Scrapbooking is the perfect way to bring your travel memories to life, and an excellent way to embrace traveling from home!
I've been scrapbooking for many years now, putting together journals, diaries, binders, maps, and photo collages of my vacation memories since I was young. While I'm definitely not an artist (my drawings are absolutely terrible), I find that scrapbooking allows me to be creative but also have a bit of fun!
I'm a firm believer that travel doesn't end when you come home. In fact, it's only the beginning. And by scrapbooking your travel memories, you can continue to bring the lessons and experiences you had in your vacations and exploring into your daily life.
Scrapbooking is such a fun way to bring your travels to life, and there's no right or wrong way to do it! You are free to customize and create whatever floats your boat. I tend to go a little overboard on the stickers, myself, but to each their own.
In this post, I'm outlining five different ways you can scrapbook your travel memories, all of which are methods I use. If you're concerned that making an entire scrapbook seems a bit overwhelming, don't worry! I've listed other ideas too. You'll see real examples of scrapbook pages, materials, and tools that I use to bring my travels to life, as well as products I recommend, like acid-free tape squares (so your photos don't turn yellow over time).
Here are five ways to scrapbook your travel memories!
How to Scrapbook Your Travel Memories
Scrapbooking Materials & Costs
If you are planning to make one of the scrapbook ideas listed here, these are my recommendations for scrapbooking supplies, where to find them, and how much to budget.
Scrapbooking Supplies
I get most of my scrapbooking supplies at Michael's or Target, but as of late, Amazon has been helpful. In my experience, Michael's definitely has the most options for scrapbooks, paper, craft supplies, and stickers. As a teacher, I get 15% off my purchases at Michael's by showing my ID. Plus, they always have huge sales and tons of coupons, making Michael's a great place for scrapbooking supplies!
Scrapbooking doesn't have to be an expensive hobby, but it can definitely become that way rather quickly. There are so many choices out there that it's easy to get carried away! If you are working on your first scrapbooking project, I recommend starting small. Only buy what you need, and then later, if you decide to make more, you can add to your supplies. Budget about $75 for your first scrapbook, which should cover the scrapbook, paper, photos, and decorative materials, such as stickers and pens.
Scrapbook Product Recommendations
Paper in different sizes & colors
You'll want plenty of paper to create your own pages, paper to cut it out and use for photograph backgrounds, paper for written excerpts and journal entries, or even to test out certain color combinations. I recommend having 8x10 printer paper, as well as 10x10 or 12x12 scrapbook paper if you are making a large binder.
Having multiple colors and patterns give you more creative options and choices. Based on the theme of my scrapbook, I choose 75% solid colors, and then 25% with patterns. For my Ireland scrapbook, I chose the plain colors green, orange, and gold for my pages, and then added a few extra patterns with green and white stripes, shamrocks, and gold lines.
Michael's has an entire aisle devoted to paper. Go crazy, my friends, but be sure to recycle what you don't use!
Markers/Special Pens/Pencils
The more, the better! You'll want plenty of colors and different types. Try calligraphy pens, sharpies, markers, colored pencils, and of course, a good eraser and white-out, in case you make a mistake. I use these Faber-Castell pens and Tombow dual-brush markers on a regular basis for bullet journaling and scrapbooking, and absolutely love Prismacolor colored pencils.
Acid-Free Tape Squares
Don't use regular tape for scrapbooking purposes - make sure it's acid-free to reduce brown edges and so you don't ruin your pictures. I use these acid-free tape squares that are perfect for adhering photographs to pages. They come in a dispenser that you can keep, and you only need to buy replacement squares.
Stickers (you can never have too many)
Give me alllll the stickers! Even my Spanish students know about my sticker obsession - and I use any excuse to give them out! Stickers for scrapbooking are filled with possibilities, and you can easily spend your entire scrapbooking budget on them. So, stick to a few favorites - letters in a color you like, stickers that reflect where you went on vacation, or perhaps some fun flowers or outdoor items. My favorite sticker brands are Jolee's Boutique and Recollections, which you can find online from Michael's, Amazon, or Target.
Pictures
For most scrapbooks, you'll want to have photographs to commemorate your travels! But before you print them out, make sure you've decided which of the following options you're going to be focusing on. At best, make sure your photos are in one place, such as Google Photos, or perhaps an SD card or album. That way, you can easily print out or upload the ones you need, and they are somewhat organized.
Five Ways to Scrapbook Your Travel Memories
Create A Traditional Travel Scrapbook
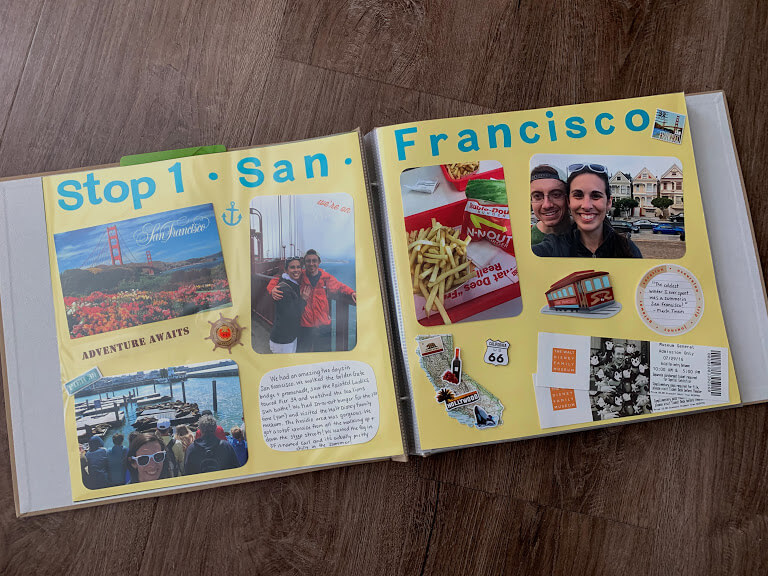
The first and most common way to scrapbook your travel memories is to create a proper scrapbook in binder form.
I typically use a 12x12 binder like this one with plastic page inserts where you can add pages that you design, giving you more creativity and freedom than a notebook.
The first thing to decide is organization and layout. For our honeymoon scrapbook, I chose to commemorate each destination along our 3-week road trip, rather than every individual day. You can see an example of this in the photo above for San Francisco. We spent 3 days in San Fran but I only devoted 2 pages to it, to save room for other destinations.
You can choose to organize your scrapbook by day, by destination, by week, or however else you like! I refer to my travel journal to help with this part. Next, I gather the photos I want to use in the scrapbook, and print them out usually at CVS or Walmart, depending on who has the best deals at the moment. With photos in hand, I'm ready to begin!
I gather my photos, plus all any ticket stubs, paper, postcards, mementos, or other travel-related souvenirs related to the trip, and begin to organize everything into piles/pages. I'll usually do this on the floor of my living room or bedroom. Then, for each destination, I go back to my travel journal, social media posts, and personal memories to write a short "blurb" about what we did, where we went, any funny stories or travel fails, or memorable moments. I choose anywhere from 2-5 photos to include on the pages and then decide on the arrangement. Don't start taping anything down until you are positive it all fits and looks good! Lastly, I add themed stickers for decoration.
You can add as much or as little as you want to your scrapbook pages - it's completely up to you. If you'd rather not write a lot of text, no problem! Use the space for more photos. If you want to include all of your ticket stubs from the concerts you attended on your trip, add them! Have fun playing around with different arrangements, styles, and layouts. There's no right or wrong way to do it.
*Pro Tip: If you have too many pages but not enough room in the scrapbook, you can buy these extensions to give you more space, or just make a second one. I have 2 scrapbooks for my semester abroad - there were too many memories to fit into one book!
Scrapbook With A Travel Coloring Book or Another Collective Item.
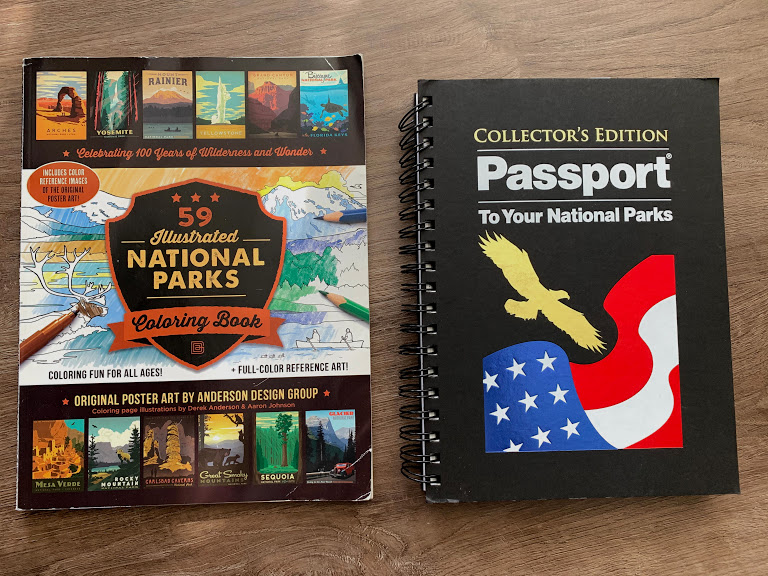
After making multiple scrapbooks to commemorate our travel adventures, I was inspired to try something new when coloring books started making a comeback. To this day, I am still obsessed with Johanna Basford's gorgeous coloring books, but it was thanks to a friend I discovered the National Parks had coloring books, too!
After exploring seven National Parks on our honeymoon, I knew we were just getting started. Now, with more than 60 US National Parks to explore, I have the perfect way to honor our time in each one we visit - with a National Parks coloring book - and a corresponding stamp collector's book, too!
For each park that we visit (As of this post, 13 total!), I color the corresponding page with my favorite Prismacolor pencils and add it to a 3-ring binder with sheet protectors. I love this option because it requires less work, but also allows for creativity and remembering places as special as the national parks. I also collect stamps from each of the parks we visit and put into the Stamp Collector Passport Book. Is this really for children? Most likely. Do I care? Not at all.
Coloring books are an excellent option to commemorate your travel memories, especially if you want something less complex than making a scrapbook yourself.
Design a Photo Collage Travel Scrapbook.
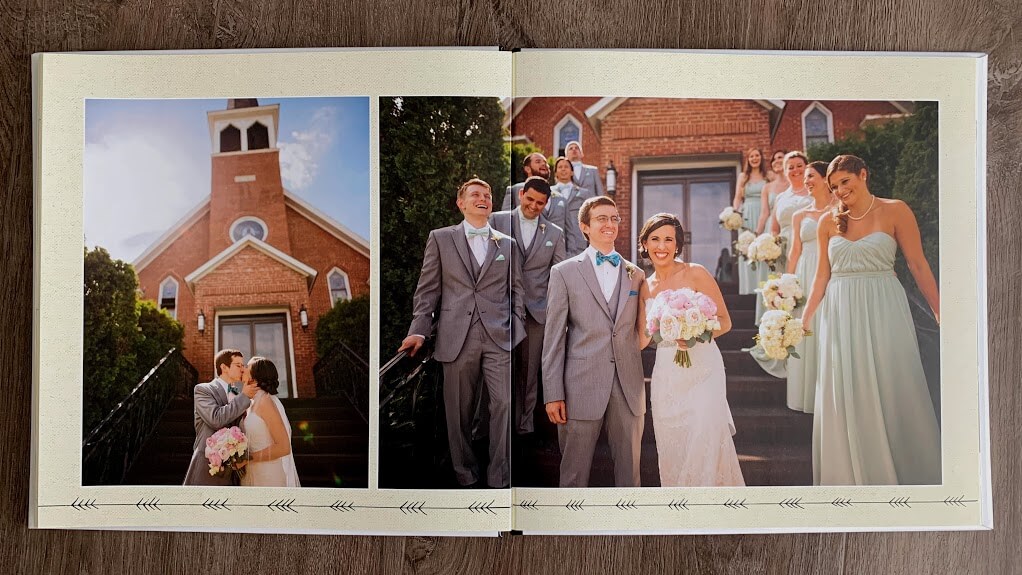
From Shutterfly to Snapfish, even your local pharmacy or Walmart - photo books are a great way to recall your vacation memories. You have lots of design and size options and can choose a pre-existing layout, or make your own. A photo book is an excellent option for anyone who feels that making a scrapbook themselves is just too much to do - and that's totally okay!
I've been using Shutterfly since 2012, and continue to use it for photo-related gifts. Every year, I make my parents a calendar with photos from the previous year. Shutterfly always has coupons and discounts plus their site is user-friendly. This is not sponsored, just a heartfelt recommendation. I even used Shutterfly to make our wedding photo album, as seen above!
Photo albums are always a good idea - and can make a great gift or travel memento.
Make a Bullet Journal or Update Your Existing Travel Journal.
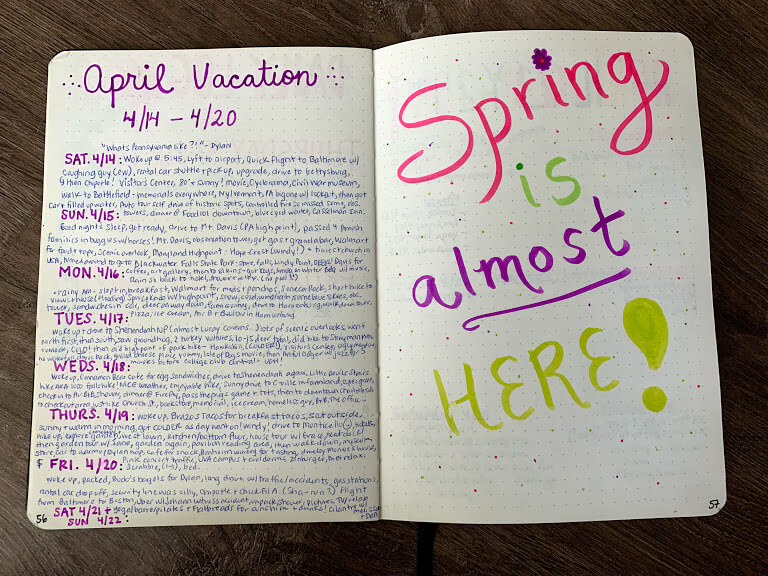
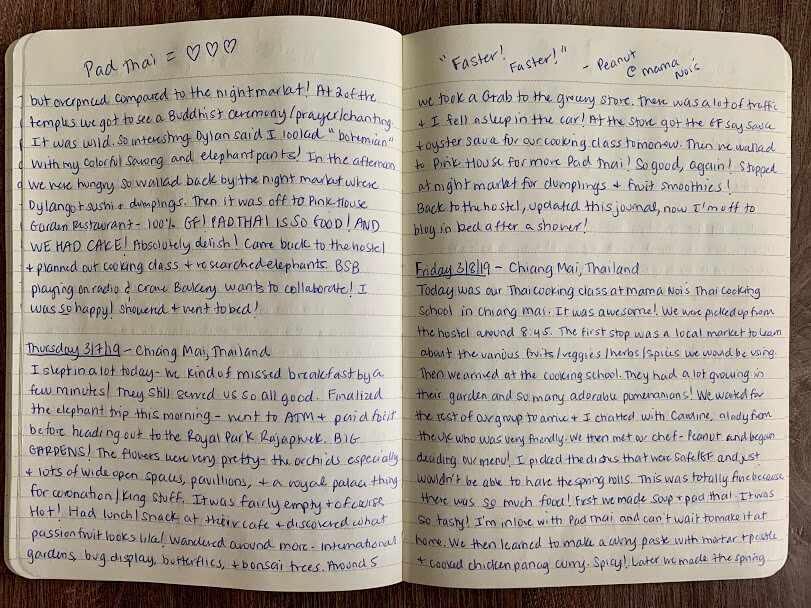
I wrote so much, I had to buy a second journal.
Did you keep a travel journal on your last vacation? Use it for scrapbooking!
I bring a travel journal on all of our vacations - and even needed a second one for our 6 month trip around the world last year! Dylan attempted to keep a travel journal too - but that lasted a few days before he opted to take notes on his phone instead.
For shorter trips, I bring my bullet journal - my everyday place for keeping lists, notes, thoughts, and ideas. I dedicate certain pages to writing about our travels with fun markers and pens, which can sometimes even include photos, ticket stubs, or funny quotes! If you already have an existing travel journal, go back and add to it! You can decorate with markers and pens, add photos, ticket stubs, or anything else you want to remember.
With the memories already written down, you've done most of the work! All you have to do is go in and have fun making it look as pretty or creative as you like.
Invest in a Commemorative Travel Map.
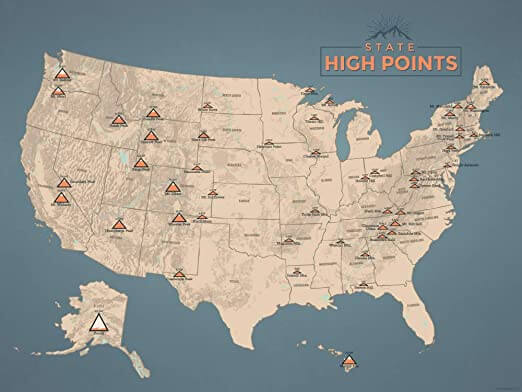
Dylan and I haven't hung up any decorative items in our current apartment, but I can't wait until we have a house to hang up all of our maps!
It all started with an actual map Dylan bought in 2012. It was a map of New Hampshire and Vermont, to commemorate our new hiking adventures. We flattened out the map and attached it to a bulletin board, hanging it right in our foyer. For each hike, we placed a pushpin on the map, and watched our adventures grow.
Shortly after our honeymoon adventure, I wanted to add more maps to commemorate our travels and hikes. I bought a National Parks map with a sticker to commemorate visiting each park. Later, I also added a US State High Points map as well. Our front entryway became dedicated to a collection of our hiking adventures and travels. My best friend Kristen bought me a scratch map of the world for my birthday last year, which I can't wait to hang in our home one day soon along with the others.
Maps are a perfect way to keep track of your travels, dream about future vacations, and commemorate your adventures. And they are super easy to do! Check out Mapiful for more inspiration and maps!
Final Thoughts on Scrapbooking Your Travels
After sharing all the ways to scrapbook your travel memories, I'm ready to make another one! I hope these ideas have given you some inspiration to keep the travel spirit alive. Remember, it doesn't have to be complicated. A photo book or a map are some of the easiest ways to travel from home. To quote the movie Up, adventure is OUT THERE!
Well, friends, I'm off to try and find a way to showcase the 10,000+ photos from our six-month trip around the world! I'm not sure that there's a scrapbook big enough. Happy crafting!
Do you scrapbook?
What is your favorite way to scrapbook your travel memories?
Leave some creative inspiration in the comments below!



Cherrie Ann Balictar says
This is super old school and I love it. Usually, we just save our memories on social media or in Dropbox. But scrapbooking really makes it special. Excellent post. 🙂
Jennifer Fitzpatrick says
Thank you Cherrie! I'm so glad you like it - and yes, scrapbooking truly is a special way to bring our travel memories to life!
Edwardo Raguay says
We are very interested in Journaling. I use three journals. How many do you use?
Jennifer Fitzpatrick says
Hi there! I use a bullet journal for daily journaling/to dos, plus another separate one for traveling.
Diane Schwarz says
Jen,
Thank you getting me motivated to organize my travel memories! Love your post and pictures. and I am intrigued with that Instax Mini camera. Going to check that out next. Thanks so much for your information and inspiration!
Jennifer Fitzpatrick says
Thanks Mom! I appreciate you reading! 🙂
Gail Conder says
Hey Jennifer,
I am a little behind in scrapbooking our travels/vacations. Do you think it is better to start with the most recent and work my way back?
We love visiting the National Parks and have a lot more to visit. We are 70 and 71 so we need to get busy.
Thanks for your inspiration and great ideas.
Gail
North Carolina
Jennifer Fitzpatrick says
Hi Gail! Love that you are into scrapbooking, how fun! It's completely up to you on how you'd like to go about it. But I've found it can be easier to focus on one thing at a time, and starting with the most recent trip since it's fresh in your mind, and you may also have some mementos/items handy. Hope this helps, enjoy!