Have you ever had gluten-free pierogi? It's a cooking project for sure, but the final results are so worth it. Here's how I make them and how you can make your own pierogi at home - gluten-free!
This post may contain affiliate links. Please see my disclosure page for more information. Thanks!

- About This Gluten-Free Potato Pierogi Recipe
- Can I Buy Frozen Gluten-Free Pierogi?
- How Much Time Do I Need To Make Pierogi
- Ingredients For Gluten-Free Pierogi
- Gluten-Free Flour Testing
- How To Make Gluten-Free Pierogi
- Troubleshooting: Common Questions With Gluten-Free Pierogi
- Can I Make These Pierogi Dairy-Free?
- What Can I Serve With Gluten-Free Pierogi?
- How Should I Store Pierogi?
- Can I Freeze or Make Ahead Gluten-Free Pierogi?
- More Gluten-Free Recipes To Try
About This Gluten-Free Potato Pierogi Recipe

First of all, I want to preface this and say these are not authentic pierogi, but my take on them. This is another travel-inspired recipe, like my gluten-free pad thai!
If you've never tried pierogi, they are dumplings typically from Eastern Europe, and can be filled with mixtures of potatoes, cheese, onions, bacon, and other tasty ingredients. They are often boiled and then pan-fried so they taste nice and crispy.
I tried pierogi growing up on Long Island (and a box of Mrs. T's was always a staple in our freezer). But once I was diagnosed with celiac disease in 2009, that meant no more pierogi for me. Then one day, during lockdown and 2020, I decided enough was enough. I was craving crispy pierogi with cheese and dreamt of dipping them into some sour cream. So I said to myself, in the voice of Rafiki from the Lion King, "IT IS TIME."
Can I Buy Frozen Gluten-Free Pierogi?
Yes! You can definitely buy frozen pierogi now thanks to companies like Feel Good Foods. They have frozen certified gluten-free pierogi available in Whole Foods and other grocery stores.
The Feel Good Foods pierogi are tiny, but good! But like any comfort food recipe, I wanted the satisfaction and pride of making them myself, just like these homemade gluten-free croissants. (Yes, they really are gluten-free, and I think they are better than the ones Schar makes!)
And I wanted my pierogi to be a little bit bigger.
How Much Time Do I Need To Make Pierogi

This recipe is a project, so you'll want to give yourself 2-3 hours to make them from start to finish as there are many steps. But I'll walk you through each part so you know what to do and can soon be on your way to enjoying homemade gluten-free potato pierogi with sour cream or apple sauce!
Are you looking for something similar to a pierogi? Try these gluten-free empanadas with beef and cheese. Scrumptious!
Ingredients For Gluten-Free Pierogi
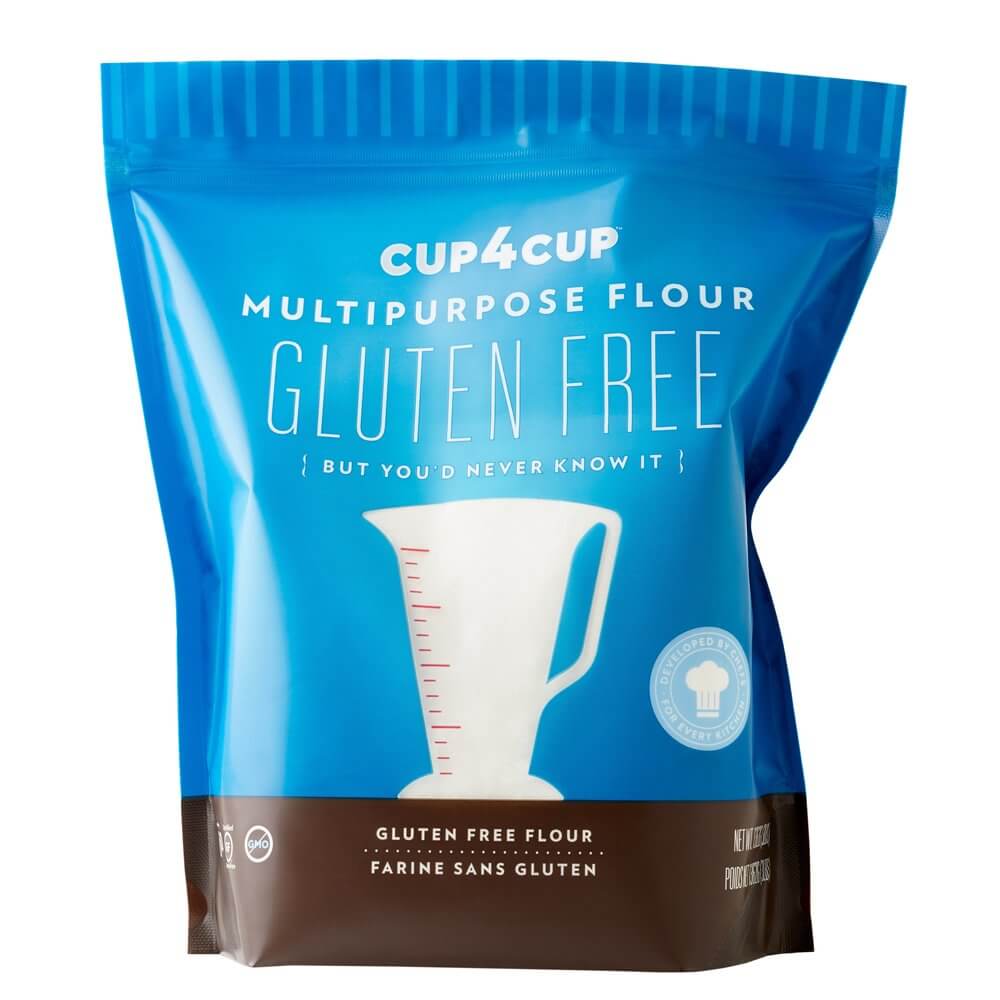
Gluten-Free Flour: I use Cup4Cup multi-purpose gluten-free flour for this recipe. It is my #1 choice for cookies, pastries, and yeast-based baked goods. Cup4Cup has given me great success in the kitchen over the last eight years, helping me to create delicious croissants, empanadas, naan, chocolate chip cookies, pierogi, bagels, and more. Please note if you use a different gluten-free flour your results may vary.
Gluten-Free Flour Testing
I have tested this recipe with both Cup4Cup and Bob's Red Mill 1:1 Gluten-Free Baking Flour. Cup4Cup came out better and the pierogi stayed together a lot easier. Based on the composition of Cup4Cup compared to GF Jules and Better Batter, I also think those gluten-free flour blends would work well here.
If you choose to use a different gluten-free flour blend, your results will vary and I cannot speak to how they will turn out. But please feel free to leave a comment if you have a question or need help troubleshooting!
Other Ingredients You Will Need:
Salt: For seasoning the pierogi dough.
Water: To thicken the pierogi dough.
Eggs: This will also help thicken and form the dough.
When it comes to the filling of these gluten-free pierogi, I keep it simple with potato, onion, and cheese. But you can always add in any other mix-ins you prefer.
Potatoes: Yep, we need potatoes! This will be the main source of our filling. I prefer russet potatoes.
Onion: Since we are caramelizing the onions, you'll want a yellow or white onion for this.
Unsalted Butter: To caramelize the onions, and then fry up the pierogi once they have boiled.
Cheese: Yes, cheese! We need cheese for the filling. I prefer to grate it myself because it tastes better. You can substitute dairy-free or lactose-free cheese if you like. I use cheddar.
Salt & Pepper: Not a whole lot of seasoning is needed for these babies, but a little S&P will help!
Sour Cream & Applesauce: These are delicious ways to dip and serve your pierogi. Optional, but it's what I always have!
How To Make Gluten-Free Pierogi
First, you'll assemble the dough for the pierogi using a stand mixer or your hands. Combine the ingredients and then knead lightly for about a minute to form a smooth cohesive dough. Then you'll let it rest in the fridge for about 30 minutes as you prepare the filling.


Next, you'll prepare the potato, cheese, and onion filling to go inside the pierogi dumplings. You'll boil the potatoes, caramelize the onions, grate your cheese, then combine everything together with salt and pepper.


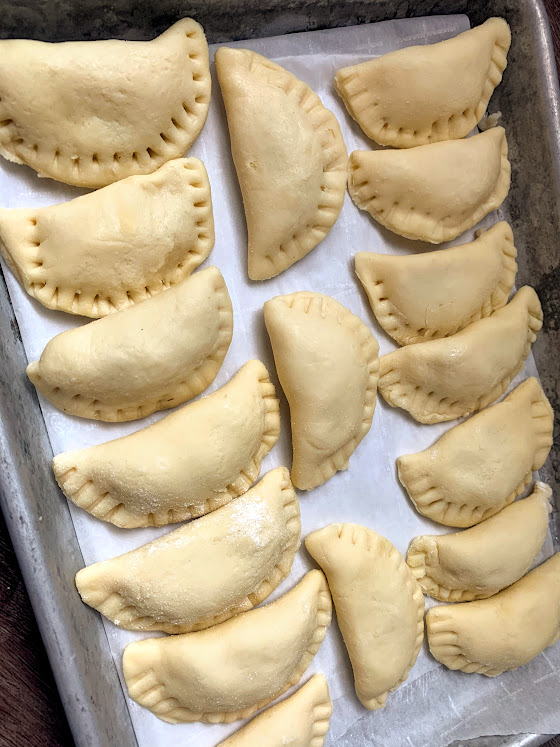
After that, you'll roll out the pierogi dough and cut out dumplings using a biscuit cutter or drinking glass. Then you'll add a small amount of filling to each circle and fold them over, using a small amount of water to seal and crease the edges with a fork.


The final steps are boiling and frying. You'll boil the pierogi in hot water for a few minutes, then fry them in a little butter so they get nice and crispy.


I know, many steps. So give yourself lots of time here. But I promise the result is worth it!
You can also watch me prepare and make these gluten-free pierogi in this Instagram reel here:
Troubleshooting: Common Questions With Gluten-Free Pierogi
My dough cracked/didn't stay together. What happened?: You might need more liquid. Depending on the gluten-free flour you used (If it wasn't Cup4Cup) you may need to add more water to help the dough stay together. Baking without gluten is tricky, which means you won't have the stickiness of gluten keeping the dough together. It's okay to add more water to get a consistent dough, and to knead the dough with your hands if necessary. There's no gluten to develop here, so it won't hurt the dough!
My filling is leaking through the dough when I assemble the pierogi. This happens to me sometimes - use less! I find that spreading it into a thin line helps the pierogi dough seal together easier without leakage.
My pierogi taste too doughy - what happened? You might not have rolled them out thinly enough. I usually do this by eye but will roll the dough out to about ¼ or ⅛ of an inch in thickness.
My pierogi won't stay together - how can I help them stay sealed? Keep a small cup or bowl of room-temperature water nearby as you assemble. Before sealing, dip your finger into the water and lightly press around the areas you are going to seal together. Then crimp together with your fingers, and for additional sealing and a cute design, use the back of a fork to add lines.

Can I Make These Pierogi Dairy-Free?
You can, but you'll have to substitute my backup gluten-free flour blend (Bob's Red Mill 1:1 Baking Flour) or use GF Jules Flour instead. Additionally, you'll want to skip the cheese and use olive oil or another cooking oil for frying the onions and the pierogi.
What Can I Serve With Gluten-Free Pierogi?
Whatever you would like! I love having pierogi with gluten-free sausages or some roasted vegetables. You can serve pierogi with dipping sauces like sour cream or apple sauce, or sprinkle them with chopped bacon, chives, or even additional caramelized onions. The options are endless!
How Should I Store Pierogi?
Pierogi should be stored in the refrigerator and will keep for 3-4 days. Reheat in the microwave or on the stovetop to crisp them up again with a little butter.
Can I Freeze or Make Ahead Gluten-Free Pierogi?
Yes, you can definitely freeze or make gluten-free pierogi ahead of time. Simply move your baking tray with assembled dumplings to the freezer and allow them to firm up for 30 minutes. Once firm, place them into ziploc or reusable bags. Freeze for up to 3 months. When ready to eat, boil, fry, and serve.
More Gluten-Free Recipes To Try
Looking for a gluten-free scone recipe? Be basic and enjoy it with these gluten-free pumpkin scones and maple frosting.
Want to practice your pie-making skills? Homemade apple pie hits the spot. Gluten-free but no one will know!
Feel like an easy quickbread? This banana bread with walnuts is a winner!
Ready to take your baking skills to the next level? Try these delightful, buttery, and flaky gluten-free croissants.
Discover all the gluten-free baking recipes on the blog right here.
Here's the full recipe for gluten-free potato pierogi!
If you love this recipe, please leave a comment! Thank you so much!
Gluten-Free Pierogi
Tasty potato pierogi that crisp up nicely in a frying pan. Easy to customize with your favorite fillings!
Ingredients
- For the Dough
- 3 cups gluten-free flour blend, like Cup4Cup
- ½ teaspoon salt
- ½ cup water, room temperature
- 3 eggs
- For the Filling
- 1-2 russet potatoes, peeled & chopped small
- 1 small yellow onion, diced small
- 4 Tablespoons unsalted butter, divided
- 1 cup cheddar cheese, freshly grated
- Salt & Pepper to taste (start with ¼ teaspoon and increase from there)
- Sour cream or apple sauce, for serving
- Freshly chopped chives, for serving (optional)
Instructions
Into a large mixing bowl, add the gluten-free flour and salt, and whisk. Next, pour the water, and add the eggs, one at a time, and mix at low speed with a stand mixer or by hand, until a dough begins to form.
Onto a lightly floured countertop, knead the dough for 1-2 minutes until smooth. Let it rest for 30 minutes wrapped in plastic wrap or beeswrap in the refrigerator while you prepare the filling.
Place the potatoes in a medium-sized pot and cover with water, just until the potatoes are completely submerged. Add 1 teaspoon salt and bring to a boil. When the water boils, reduce to a simmer for 8-10 minutes. Check with a fork for tenderness. When soft, drain the potatoes.
While the potatoes are cooking, grate your cheese with a box grater and set aside. Then, caramelize the onions. Place the onions and 1 tablespoon butter in a frying pan and sauté, over low heat, for 20-25 minutes. Low and slow is the key to getting the onions to turn that golden brown color and become soft and sweet. When caramelized, remove from heat and set aside.
Return potatoes to the pot they were cooked in and add 1 tablespoon butter. Begin mashing with a potato masher or fork. Add in the caramelized onions, grated cheddar cheese, and salt and pepper to taste. Continue mixing until potatoes are all well-mashed.
To assemble the pierogi, roll out the dough with a rolling pin on a lightly floured surface. Cut out circles in the dough using a biscuit cutter or a drinking glass with a 3-inch diameter. Place 1 tablespoon filling into the center of each pierogi circle. Wet your fingers and fold over, creating a half-moon shape. Seal them together by lightly brushing water on one edge of the dough, then pinching the dough together with your fingers. Finally, use the tines of a fork to make lines along the edges.
Bring a large pot of water to a boil with 1 teaspoon salt. When the water boils, place pierogi lightly in the water and boil in small batches, for 5-6 minutes. They should float at the top after 5 minutes. Remove with a slotted spoon and transfer to a plate.
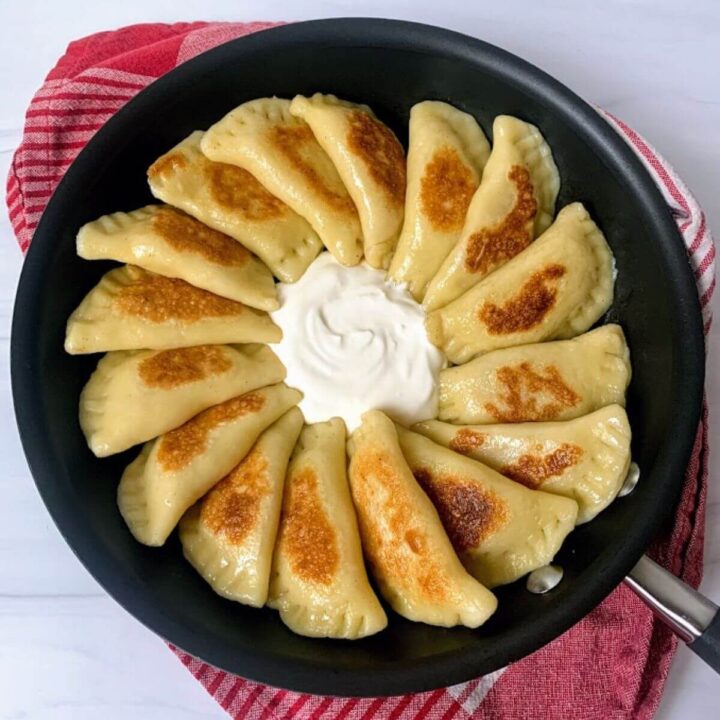
To crisp up the pierogi, melt 1 tablespoon butter in a frying pan over medium heat (you can use the same frying pan from the onions). Fry pierogi in small batches, 3-4 minutes per side, until golden brown and crispy.
Serve with sour cream (dairy-free, if you like!) and apple sauce, if desired, or even a sprinkle of freshly chopped chives.
Notes
Dairy-Free: You can make these dairy-free using dairy-free cheese & butter, and a gluten & dairy-free flour blend. Cup4Cup, which is recommended in this recipe, contains milk powder. I would suggest Bob's Red Mill 1:1 Baking Flour as an alternative. Please see the notes in my blog post for more information.
Storage: Pierogi should be stored in the refrigerator and will keep for 3-4 days. Reheat in the microwave. You can also freeze pierogi for up to 3 months. Simply move the tray to the freezer and allow them to firm up for 30 minutes, then place in bags. When ready to eat, boil, fry, and serve.
Nutrition Information
Yield 12 Serving Size 5Amount Per Serving Calories 325Total Fat 14gSaturated Fat 7gTrans Fat 0gUnsaturated Fat 6gCholesterol 67mgSodium 281mgCarbohydrates 41gFiber 2gSugar 2gProtein 8g
The nutrition information on each recipe card is provided as a courtesy and for your convenience. The data is calculated by Nutritionix. You are encouraged to make your own calculations based on your ingredients and preferred nutritional facts calculator. While I try to make sure they are accurate, I cannot guarantee the accuracy of these calculations.
Do you like pierogi? Have you had them before?
Tell me in the comments below!



Kathie Wiley says
My perogie dough was a little tough and wanted to crack,,,, suggestions?
Not really shiney either
Jennifer Fitzpatrick says
Hi Kathie! Which gluten-free flour did you use? If it cracks easily, I'd say use less filling!
Amy says
I tried your recipe using Bob's Red Mill flour (with Xanthan gum). Total failure. Dough was tough and not shiny.
They cracked, would not stay together. Used very little filling.
Ended up throwing every out.
Any suggestions?
Jennifer Fitzpatrick says
Hi Amy, I'm sorry this happened! You used the blue bag of Bob's Red Mill too? That's such a bummer, as I had success with them, but it's not my first choice. As I mentioned in the post, the best gluten-free flour for the job is Cup4Cup for these pierogi, and they will stay together the best. However, when using other gluten-free flour blends, this can sometimes mean you need to add more liquid to help the dough stay together. Since there is no gluten to develop, it's okay to manipulate the dough & touch/form it as much as you need to. I would suggest adding more water (1/4 cup at a time) if you try it with Bob's again. Was this your first time baking with Bobs?
Amy says
Thanks for your suggestions. This is the first time baking with any gluten free flour. I'll let you know if I try again.
Jennifer Fitzpatrick says
Oh got it! Yes, if this is your first time, I highly suggest trying a GF flour like Cup4Cup as it will behave the most similarly to All Purpose Flour. I'd also suggest reading through this post on top gluten-free baking tips so you have a better idea of what to expect!
Tricia says
Any success making egg free?
Jennifer Fitzpatrick says
I am not egg-free, only gluten-free for celiac disease. Sorry!
Shay says
These turned out amazing. Ate a few right away, freezing the rest for Easter in a week.
Would you recommend defrosting before boiling?
Jennifer Fitzpatrick says
So happy to hear it! I usually eat them the day of, so for any you decide to freeze, I would boil them directly from frozen to prevent the dough getting too soft/tearing.